


在开始正文之前先交代几句:
- TensorRT-LLM编译和镜像制作过程可参考《基于TensorRT-LLM和Triton部署ChatGLM2-6B模型推理服务》,本文不再赘述;
- 由于官方源码目前不支持ChatGLM2-6B模型的多卡推理,上一篇文章只验证了单机单卡推理服务部署,本文新增了单机多卡推理服务部署的内容;(为啥没有验证多机多卡推理?因为缺卡缺机器。。)
- 同样因为源码中ChatGLM2-6B相关的bug(官方repo回复说在改了,下个版本修复),上一篇文章没有做benchmark测试,本文新增了LLaMA2-6B模型在TensorRT-LLM下的benchmark测试;
- 本文所有实验在4 * Tesla V100-PCIE-32GB上进行。
1. LLaMA2-7B单卡推理
- 模型转换
首先进入TensorRT-LLM目录下执行make -C docker run启动容器,然后在容器中执行以下命令进行模型转换:
cd /code/tensorrt_llm/examples/llama

python build.py --model_dir ./pyTorchModel/llama2-7b \
                --dtype float16 \
                --remove_input_padding \
                --use_gpt_attention_plugin float16 \
                --use_gemm_plugin float16 \
                --use_weight_only \
                --max_output_len 2048 \
                --max_batch_size 16 \
                --output_dir ./trtModel/llama2-7b-weight_only-bs16/
注:经测试,在V100 GPU上不支持Fused MultiHead Attention,所以build命令不加--enable_context_fmha参数,--use_weight_only是为了对模型进行量化,避免单卡显存不够,--world_size参数不设置默认为1,即只用单卡;--max_input_len不设置默认为2048。
转换后的模型文件如下:
trtModel/
└── [4.0K]  llama2-7b-weight_only-bs16
    ├── [1.3K]  config.json
    ├── [6.5G]  llama_float16_tp1_rank0.engine
└── [224K] model.cache- 模型推理
目录/code/tensorrt_llm/examples/llama下提供了一个脚本用于验证模型推理,运行后会调用转换后的模型进行文本续写任务:
python3 run.py --max_output_len=256 \
 --tokenizer_dir ./pyTorchModel/llama2-7b \
--engine_dir=./trtModel/llama2-7b-weight_only-bs16/注:如果报错AttributeError: '_Runtime' object has no attribute 'address',是因为--max_batch_size太大导致的,这个和机器配置有关,减小batchsize重新build即可。
- Benchmark测试
TensorRT-LLM提供了benchmark测试脚本,支持单机单卡、单机多卡、多机多卡,进入/code/tensorrt_llm/benchmarks/python目录运行以下命令:
python benchmark.py \
    -m llama_7b \
    --mode plugin \
    --batch_size "1;4;8;16" \
    --engine_dir /code/tensorrt_llm/examples/llama/trtModel/llama2-7b-weight_only-bs16\
--input_output_len "128,128;128,2048;2048,128;2048,2048"该命令设置了测试的batchsize分别为1,4,8,16,不能超过build阶段设置的--max_batch_size;(输入文本长度,输出文本长度)分别为(128,128)(128,2048)(2048,128)(2048,2048),不能超过build阶段设置的--max_input_len和--max_output_len 。运行后有如下输出:
[BENCHMARK] model_name llama_7b world_size 1 num_heads 32 num_kv_heads 32 num_layers 32 hidden_size 4096 vocab_size 32000 precision float16 batch_size 1 input_length 128 output_length 128 gpu_peak_mem(gb) 22.58 build_time(s) 0 tokens_per_sec 48.79 percentile95(ms) 2624.472 percentile99(ms) 2624.473 latency(ms) 2623.671 compute_cap sm70
[BENCHMARK] model_name llama_7b world_size 1 num_heads 32 num_kv_heads 32 num_layers 32 hidden_size 4096 vocab_size 32000 precision float16 batch_size 4 input_length 128 output_length 128 gpu_peak_mem(gb) 22.98 build_time(s) 0 tokens_per_sec 182.6 percentile95(ms) 2805.113 percentile99(ms) 2805.18 latency(ms) 2803.97 compute_cap sm70
[BENCHMARK] model_name llama_7b world_size 1 num_heads 32 num_kv_heads 32 num_layers 32 hidden_size 4096 vocab_size 32000 precision float16 batch_size 8 input_length 128 output_length 128 gpu_peak_mem(gb) 23.47 build_time(s) 0 tokens_per_sec 338.99 percentile95(ms) 3023.33 percentile99(ms) 3023.33 latency(ms) 3020.716 compute_cap sm70
[BENCHMARK] model_name llama_7b world_size 1 num_heads 32 num_kv_heads 32 num_layers 32 hidden_size 4096 vocab_size 32000 precision float16 batch_size 16 input_length 128 output_length 128 gpu_peak_mem(gb) 24.47 build_time(s) 0 tokens_per_sec 588.97 percentile95(ms) 3488.141 percentile99(ms) 3488.141 latency(ms) 3477.232 compute_cap sm70
......
测试结果整理如下表(单卡V100-32G GPU,INT8 weight-only quantization):
| Model | Batch Size | TP | Input Length | Output Length | Throughput(out tok/s) |
|---|---|---|---|---|---|
| LLaMA2-7B | 1 | 1 | 128 | 128 | 49 |
| LLaMA2-7B | 4 | 1 | 128 | 128 | 183 |
| LLaMA2-7B | 8 | 1 | 128 | 128 | 339 |
| LLaMA2-7B | 16 | 1 | 128 | 128 | 589 |
| LLaMA2-7B | 1 | 1 | 128 | 2048 | 47 |
| LLaMA2-7B | 4 | 1 | 128 | 2048 | 171 |
| LLaMA2-7B | 8 | 1 | 128 | 2048 | 294 |
| LLaMA2-7B | 16 | 1 | 128 | 2048 | OOM |
| LLaMA2-7B | 1 | 1 | 2048 | 128 | 36.4 |
| LLaMA2-7B | 4 | 1 | 2048 | 128 | 79 |
| LLaMA2-7B | 8 | 1 | 2048 | 128 | 104 |
| LLaMA2-7B | 16 | 1 | 2048 | 128 | OOM |
| LLaMA2-7B | 1 | 1 | 2048 | 2048 | 43 |
| LLaMA2-7B | 4 | 1 | 2048 | 2048 | 136 |
| LLaMA2-7B | 8 | 1 | 2048 | 2048 | OOM |
| LLaMA2-7B | 16 | 1 | 2048 | 2048 | OOM |
2. LLaMA2-7B单机多卡推理
- 模型转换
多卡推理需要在build时设置--world_size 来指定用几张卡,这里设置为4,同时设置--tp_size指定并行方式为4路张量并行,因为用多张卡,可以把--max_batch_size设置得比单卡情况下更大一些,这里设置为64:
cd /code/tensorrt_llm/examples/llama

# 单机4卡,4路张量并行
python build.py --model_dir ./pyTorchModel/llama2-7b \
                --dtype float16 \
                --remove_input_padding \
                --use_gpt_attention_plugin float16 \
                --use_gemm_plugin float16 \
                --output_dir ./trtModel/llama2-7b-tp4-bs64/ \
                --max_output_len 2048 \
                --max_batch_size 64 \
                --world_size 4 \
                --tp_size 4
转换后的模型文件如下:
llama2-7b-tp4-bs64/
├── [1.3K]  config.json
├── [3.3G]  llama_float16_tp4_rank0.engine
├── [3.3G]  llama_float16_tp4_rank1.engine
├── [3.3G]  llama_float16_tp4_rank2.engine
├── [3.3G]  llama_float16_tp4_rank3.engine
└── [226K] model.cache- 模型推理
运行多卡推理的命令只需在前面加上mpirun -n 4 --allow-run-as-root ,其余参数设置方式和单卡一样,单机4卡推理(文本续写任务):
mpirun -n 4 --allow-run-as-root \
python3 run.py --max_output_len=256 \
               --tokenizer_dir ./pyTorchModel/llama2-7b \
--engine_dir=./trtModel/llama2-7b-tp4-bs64/- Benchmark测试
cd /code/tensorrt_llm/benchmarks/python

mpirun -n 4 --allow-run-as-root \
python benchmark.py \
    -m llama_7b \
    --mode plugin \
    --batch_size "1;8;16;32" \
    --engine_dir /code/tensorrt_llm/examples/llama/trtModel/llama2-7b-tp4-bs64 \
--input_output_len "128,128;128,2048;2048,128;2048,2048"同样地,batchsize不能超过build阶段设置的--max_batch_size;(输入文本长度,输出文本长度),不能超过build阶段设置的--max_input_len和--max_output_len 。运行后有如下输出:
BENCHMARK] model_name llama_7b world_size 4 num_heads 32 num_kv_heads 32 num_layers 32 hidden_size 4096 vocab_size 32000 precision float16 batch_size 1 input_length 128 output_length 128 gpu_peak_mem(gb) 21.36 build_time(s) 0 tokens_per_sec 112.93 percentile95(ms) 1136.046 percentile99(ms) 1137.662 latency(ms) 1133.472 compute_cap sm70
[BENCHMARK] model_name llama_7b world_size 4 num_heads 32 num_kv_heads 32 num_layers 32 hidden_size 4096 vocab_size 32000 precision float16 batch_size 8 input_length 128 output_length 128 gpu_peak_mem(gb) 21.65 build_time(s) 0 tokens_per_sec 567.15 percentile95(ms) 1807.928 percentile99(ms) 1808.76 latency(ms) 1805.525 compute_cap sm70
[BENCHMARK] model_name llama_7b world_size 4 num_heads 32 num_kv_heads 32 num_layers 32 hidden_size 4096 vocab_size 32000 precision float16 batch_size 16 input_length 128 output_length 128 gpu_peak_mem(gb) 21.91 build_time(s) 0 tokens_per_sec 876.19 percentile95(ms) 2340.236 percentile99(ms) 2340.375 latency(ms) 2337.397 compute_cap sm70
[BENCHMARK] model_name llama_7b world_size 4 num_heads 32 num_kv_heads 32 num_layers 32 hidden_size 4096 vocab_size 32000 precision float16 batch_size 32 input_length 128 output_length 128 gpu_peak_mem(gb) 22.39 build_time(s) 0 tokens_per_sec 1214.33 percentile95(ms) 3376.09 percentile99(ms) 3376.09 latency(ms) 3373.066 compute_cap sm70
......
测试结果整理如下表(单机4卡 V100-32G GPU, tp=4, fp16):
| Model | Batch Size | TP | Input Length | Output Length | Throughput(out tok/s) |
|---|---|---|---|---|---|
| LLaMA2-7B | 1 | 4 | 128 | 128 | 113 |
| LLaMA2-7B | 8 | 4 | 128 | 128 | 567 |
| LLaMA2-7B | 16 | 4 | 128 | 128 | 876 |
| LLaMA2-7B | 32 | 4 | 128 | 128 | 1214 |
| LLaMA2-7B | 1 | 4 | 128 | 2048 | 108 |
| LLaMA2-7B | 8 | 4 | 128 | 2048 | 590 |
| LLaMA2-7B | 16 | 4 | 128 | 2048 | 919 |
| LLaMA2-7B | 32 | 4 | 128 | 2048 | 1258 |
| LLaMA2-7B | 1 | 4 | 2048 | 128 | 71 |
| LLaMA2-7B | 8 | 4 | 2048 | 128 | 181 |
| LLaMA2-7B | 16 | 4 | 2048 | 128 | 204 |
| LLaMA2-7B | 32 | 4 | 2048 | 128 | 215 |
| LLaMA2-7B | 1 | 4 | 2048 | 2048 | 93 |
| LLaMA2-7B | 8 | 4 | 2048 | 2048 | 452 |
| LLaMA2-7B | 16 | 4 | 2048 | 2048 | 625 |
| LLaMA2-7B | 32 | 4 | 2048 | 2048 | OOM |
3. Triton推理服务部署
- 模型转换
此处主要验证TensorRT-LLM单机多卡推理服务能否用Triton推理服务框架部署,经尝试,Triton部署前面转换的llama2-7b-tp4-bs64模型会OOM,受限于显存,这里设置--use_weight_only参数重新build一个INT8量化模型。
此外,TensorRT-LLM的一个重要特性是引入了inflight batching技术以提高吞吐量和GPU利用率,根据官方文档的介绍,要启用inflight batching,需要去除输入序列的padding,并且将所有输入张量打包在一起:
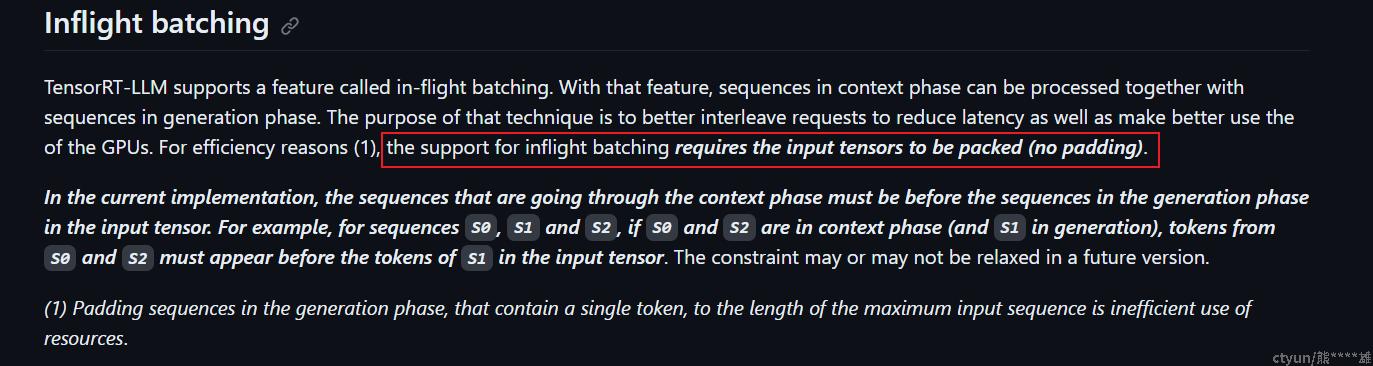
为了验证这一功能,需要在模型转换的时候就进行对应的设置,主要是--use_inflight_batching、--remove_input_padding、--paged_kv_cache三个参数,分别控制是否启用inflight batching、是否去除输入序列的padding、是否对kv_cache进行打包。最终的模型转换命令如下:
cd /code/tensorrt_llm/examples/llama

# 单机4卡,4路张量并行,INT8量化
python build.py --model_dir ./pyTorchModel/llama2-7b \
                --dtype float16 \
                --use_gpt_attention_plugin float16 \
                --use_gemm_plugin float16 \
                --output_dir ./trtModel/llama2-7b-tp4-weight_only-inflight-bs64/ \
                --use_weight_only \
                --use_inflight_batching \
                --remove_input_padding \
                --paged_kv_cache \
                --max_output_len 2048 \
                --max_batch_size 64 \
                --world_size 4 \
                --tp_size 4
转换后的模型文件如下:
llama2-7b-tp4-weight_only-inflight-bs64
├── [1.3K]  config.json
├── [1.8G]  llama_float16_tp4_rank0.engine
├── [1.8G]  llama_float16_tp4_rank1.engine
├── [1.8G]  llama_float16_tp4_rank2.engine
├── [1.8G]  llama_float16_tp4_rank3.engine
└── [226K] model.cache接下来需要准备好Triton推理所需的文件目录,首先参照tensorrtllm_backend官方文档分别准备好模型文件目录并修改配置文件,把llama2-7b-tp4-weight_only-inflight-bs64目录下的所有模型文件拷贝到tensorrtllm_backend/triton_model_repo/tensorrt_llm/1目录下,并修改配置文件tensorrt_llm/config.pbtxt中以下几处开启inflight batching:
model_transaction_policy {
  decoupled: True
}
...

parameters: {
  key: "gpt_model_type"
  value: {
    string_value: "inflight_fused_batching"
  }
}
最后准备好的模型目录结构如下:
triton_model_repo/
├── [4.0K]  ensemble
│   ├── [4.0K]  1
│   └── [5.4K]  config.pbtxt
├── [4.0K]  postprocessing
│   ├── [4.0K]  1
│   │   ├── [6.8K]  model.py
│   │   └── [4.0K]  __pycache__
│   │       └── [4.1K]  model.cpython-310.pyc
│   └── [2.0K]  config.pbtxt
├── [4.0K]  preprocessing
│   ├── [4.0K]  1
│   │   ├── [ 10K]  model.py
│   │   └── [4.0K]  __pycache__
│   │       └── [6.7K]  model.cpython-310.pyc
│   └── [2.7K]  config.pbtxt
└── [4.0K]  tensorrt_llm
    ├── [4.0K]  1
    │   ├── [1.3K]  config.json
    │   ├── [3.3G]  llama_float16_tp4_rank0.engine
    │   ├── [3.3G]  llama_float16_tp4_rank1.engine
    │   ├── [3.3G]  llama_float16_tp4_rank2.engine
    │   ├── [3.3G]  llama_float16_tp4_rank3.engine
    │   └── [226K]  model.cache
    └── [2.9K]  config.pbtxt
准备好以上文件就可以启动Triton推理服务了。
- 启动Triton服务
支持TensorRT-LLM backend的Triton inference server镜像制作方法可以参考专栏里上一篇文章《基于TensorRT-LLM和Triton部署ChatGLM2-6B模型推理服务》基于制作好的镜像启动Triton inference server容器:
# Launch the Triton container
docker run --rm -it --net host --shm-size=2g --ulimit memlock=-1 --ulimit stack=67108864 --gpus all -v /root/tensorrtllm_backend:/tensorrtllm_backend triton_trt_llm bash
cd /tensorrtllm_backend
# --world_size is the number of GPUs you want to use for serving
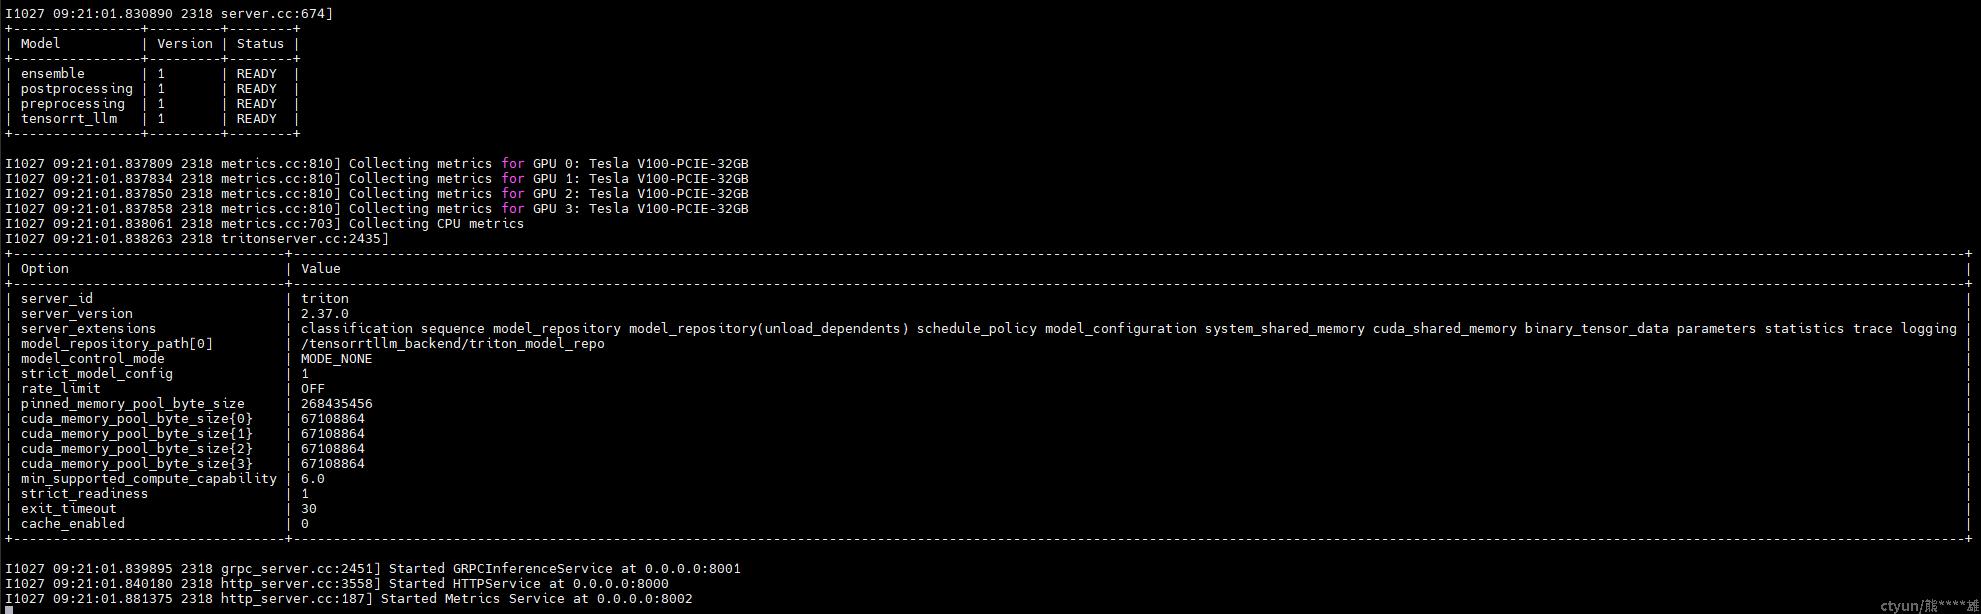
python3 scripts/launch_triton_server.py --world_size=4 --model_repo=/tensorrtllm_backend/triton_model_repo服务部署成功后有如下输出:
python3 tools/inflight_batcher_llm/end_to_end_streaming_client.py -p "What is deep learning ?" -S -o 128

