相对于以往的一个个组件安装、配置、运行、解决报错,在容器化时代,安装和运行应用将会变得简单的多。几个依赖镜像,一个docker-compose.yml配置文件,基本就全部搞定了。
今天,我们就使用docker来安装和运行一个开源免费的自动化运维平台-Spug。
首先,我们将封装好的最新版的docker-ce的离线安装包上传到服务器上,然后直接执行解压、安装即可。
[root@wlserver ~]# ls
docker-ce-20.10.21_centos-rhel_7.9-offline-installer.tar.gz
[root@wlserver ~]# tar -xzf docker-ce-20.10.21_centos-rhel_7.9-offline-installer.tar.gz
[root@wlserver ~]# cd docker-ce-20.10.21/
[root@wlserver docker-ce-20.10.21]# yum install -y *.rpm
已加载插件:fastestmirror, langpacks
正在检查 audit-libs-python-2.8.5-4.el7.x86_64.rpm: audit-libs-python-2.8.5-4.el7.x86_64
audit-libs-python-2.8.5-4.el7.x86_64.rpm:不更新已安装的软件包。
正在检查 checkpolicy-2.5-8.el7.x86_64.rpm: checkpolicy-2.5-8.el7.x86_64
checkpolicy-2.5-8.el7.x86_64.rpm:不更新已安装的软件包。
正在检查 containerd.io-1.6.9-3.1.el7.x86_64.rpm: containerd.io-1.6.9-3.1.el7.x86_64
containerd.io-1.6.9-3.1.el7.x86_64.rpm 将被安装
正在检查 container-selinux-2.119.2-1.911c772.el7_8.noarch.rpm: 2:container-selinux-2.119.2-1.911c772.el7_8.noarch
container-selinux-2.119.2-1.911c772.el7_8.noarch.rpm 将被安装
正在检查 docker-ce-20.10.21-3.el7.x86_64.rpm: 3:docker-ce-20.10.21-3.el7.x86_64
docker-ce-20.10.21-3.el7.x86_64.rpm 将被安装
正在检查 docker-ce-cli-20.10.21-3.el7.x86_64.rpm: 1:docker-ce-cli-20.10.21-3.el7.x86_64
docker-ce-cli-20.10.21-3.el7.x86_64.rpm 将被安装
正在检查 docker-ce-rootless-extras-20.10.21-3.el7.x86_64.rpm: docker-ce-rootless-extras-20.10.21-3.el7.x86_64
docker-ce-rootless-extras-20.10.21-3.el7.x86_64.rpm 将被安装
正在检查 docker-compose-plugin-2.12.2-3.el7.x86_64.rpm: docker-compose-plugin-2.12.2-3.el7.x86_64
docker-compose-plugin-2.12.2-3.el7.x86_64.rpm 将被安装
正在检查 docker-scan-plugin-0.21.0-3.el7.x86_64.rpm: docker-scan-plugin-0.21.0-3.el7.x86_64
docker-scan-plugin-0.21.0-3.el7.x86_64.rpm 将被安装
正在检查 fuse3-libs-3.6.1-4.el7.x86_64.rpm: fuse3-libs-3.6.1-4.el7.x86_64
fuse3-libs-3.6.1-4.el7.x86_64.rpm 将被安装
正在检查 fuse-overlayfs-0.7.2-6.el7_8.x86_64.rpm: fuse-overlayfs-0.7.2-6.el7_8.x86_64
fuse-overlayfs-0.7.2-6.el7_8.x86_64.rpm 将被安装
正在检查 libcgroup-0.41-21.el7.x86_64.rpm: libcgroup-0.41-21.el7.x86_64
libcgroup-0.41-21.el7.x86_64.rpm:不更新已安装的软件包。
正在检查 libsemanage-python-2.5-14.el7.x86_64.rpm: libsemanage-python-2.5-14.el7.x86_64
libsemanage-python-2.5-14.el7.x86_64.rpm:不更新已安装的软件包。
正在检查 policycoreutils-python-2.5-34.el7.x86_64.rpm: policycoreutils-python-2.5-34.el7.x86_64
policycoreutils-python-2.5-34.el7.x86_64.rpm:不更新已安装的软件包。
正在检查 python-IPy-0.75-6.el7.noarch.rpm: python-IPy-0.75-6.el7.noarch
python-IPy-0.75-6.el7.noarch.rpm:不更新已安装的软件包。
正在检查 setools-libs-3.3.8-4.el7.x86_64.rpm: setools-libs-3.3.8-4.el7.x86_64
setools-libs-3.3.8-4.el7.x86_64.rpm:不更新已安装的软件包。
正在检查 slirp4netns-0.4.3-4.el7_8.x86_64.rpm: slirp4netns-0.4.3-4.el7_8.x86_64
slirp4netns-0.4.3-4.el7_8.x86_64.rpm 将被安装
正在解决依赖关系
--> 正在检查事务
---> 软件包 container-selinux.noarch.2.2.119.2-1.911c772.el7_8 将被 安装
---> 软件包 containerd.io.x86_64.0.1.6.9-3.1.el7 将被 安装
---> 软件包 docker-ce.x86_64.3.20.10.21-3.el7 将被 安装
---> 软件包 docker-ce-cli.x86_64.1.20.10.21-3.el7 将被 安装
---> 软件包 docker-ce-rootless-extras.x86_64.0.20.10.21-3.el7 将被 安装
---> 软件包 docker-compose-plugin.x86_64.0.2.12.2-3.el7 将被 安装
---> 软件包 docker-scan-plugin.x86_64.0.0.21.0-3.el7 将被 安装
---> 软件包 fuse-overlayfs.x86_64.0.0.7.2-6.el7_8 将被 安装
---> 软件包 fuse3-libs.x86_64.0.3.6.1-4.el7 将被 安装
---> 软件包 slirp4netns.x86_64.0.0.4.3-4.el7_8 将被 安装
--> 解决依赖关系完成
base/7/x86_64                                                                                                                     | 3.6 kB  00:00:00
extras/7/x86_64                                                                                                                   | 2.9 kB  00:00:00
extras/7/x86_64/primary_db                                                                                                        | 249 kB  00:00:00
updates/7/x86_64                                                                                                                  | 2.9 kB  00:00:00
updates/7/x86_64/primary_db                                                                                                       |  17 MB  00:00:05

依赖关系解决

=========================================================================================================================================================
 Package                            架构            版本                                源                                                          大小
=========================================================================================================================================================
正在安装:
 container-selinux                  noarch          2:2.119.2-1.911c772.el7_8           /container-selinux-2.119.2-1.911c772.el7_8.noarch           41 k
 containerd.io                      x86_64          1.6.9-3.1.el7                       /containerd.io-1.6.9-3.1.el7.x86_64                        112 M
 docker-ce                          x86_64          3:20.10.21-3.el7                    /docker-ce-20.10.21-3.el7.x86_64                            84 M
 docker-ce-cli                      x86_64          1:20.10.21-3.el7                    /docker-ce-cli-20.10.21-3.el7.x86_64                       129 M
 docker-ce-rootless-extras          x86_64          20.10.21-3.el7                      /docker-ce-rootless-extras-20.10.21-3.el7.x86_64            18 M
 docker-compose-plugin              x86_64          2.12.2-3.el7                        /docker-compose-plugin-2.12.2-3.el7.x86_64                  43 M
 docker-scan-plugin                 x86_64          0.21.0-3.el7                        /docker-scan-plugin-0.21.0-3.el7.x86_64                     12 M
 fuse-overlayfs                     x86_64          0.7.2-6.el7_8                       /fuse-overlayfs-0.7.2-6.el7_8.x86_64                       116 k
 fuse3-libs                         x86_64          3.6.1-4.el7                         /fuse3-libs-3.6.1-4.el7.x86_64                             270 k
 slirp4netns                        x86_64          0.4.3-4.el7_8                       /slirp4netns-0.4.3-4.el7_8.x86_64                          169 k

事务概要
=========================================================================================================================================================
安装  10 软件包

总计:398 M
安装大小:398 M
Downloading packages:
Running transaction check
Running transaction test
Transaction test succeeded
Running transaction
  正在安装    : 2:container-selinux-2.119.2-1.911c772.el7_8.noarch                                                                                  1/10
  正在安装    : containerd.io-1.6.9-3.1.el7.x86_64                                                                                                  2/10
  正在安装    : slirp4netns-0.4.3-4.el7_8.x86_64                                                                                                    3/10
  正在安装    : docker-scan-plugin-0.21.0-3.el7.x86_64                                                                                              4/10
  正在安装    : 1:docker-ce-cli-20.10.21-3.el7.x86_64                                                                                               5/10
  正在安装    : fuse3-libs-3.6.1-4.el7.x86_64                                                                                                       6/10
  正在安装    : fuse-overlayfs-0.7.2-6.el7_8.x86_64                                                                                                 7/10
  正在安装    : 3:docker-ce-20.10.21-3.el7.x86_64                                                                                                   8/10
  正在安装    : docker-ce-rootless-extras-20.10.21-3.el7.x86_64                                                                                     9/10
  正在安装    : docker-compose-plugin-2.12.2-3.el7.x86_64                                                                                          10/10
  验证中      : fuse3-libs-3.6.1-4.el7.x86_64                                                                                                       1/10
  验证中      : 1:docker-ce-cli-20.10.21-3.el7.x86_64                                                                                               2/10
  验证中      : fuse-overlayfs-0.7.2-6.el7_8.x86_64                                                                                                 3/10
  验证中      : containerd.io-1.6.9-3.1.el7.x86_64                                                                                                  4/10
  验证中      : docker-scan-plugin-0.21.0-3.el7.x86_64                                                                                              5/10
  验证中      : 2:container-selinux-2.119.2-1.911c772.el7_8.noarch                                                                                  6/10
  验证中      : docker-compose-plugin-2.12.2-3.el7.x86_64                                                                                           7/10
  验证中      : slirp4netns-0.4.3-4.el7_8.x86_64                                                                                                    8/10
  验证中      : docker-ce-rootless-extras-20.10.21-3.el7.x86_64                                                                                     9/10
  验证中      : 3:docker-ce-20.10.21-3.el7.x86_64                                                                                                  10/10

已安装:
  container-selinux.noarch 2:2.119.2-1.911c772.el7_8   containerd.io.x86_64 0:1.6.9-3.1.el7                docker-ce.x86_64 3:20.10.21-3.el7
  docker-ce-cli.x86_64 1:20.10.21-3.el7                docker-ce-rootless-extras.x86_64 0:20.10.21-3.el7   docker-compose-plugin.x86_64 0:2.12.2-3.el7
  docker-scan-plugin.x86_64 0:0.21.0-3.el7             fuse-overlayfs.x86_64 0:0.7.2-6.el7_8               fuse3-libs.x86_64 0:3.6.1-4.el7
  slirp4netns.x86_64 0:0.4.3-4.el7_8

完毕!
启动docker相关服务。
[root@wlserver docker-ce-20.10.21]# systemctl start docker.service docker.socket containerd.service
[root@wlserver docker-ce-20.10.21]# systemctl enable docker.service docker.socket containerd.service
Created symlink from /etc/systemd/system/multi-user.target.wants/docker.service to /usr/lib/systemd/system/docker.service.
Created symlink from /etc/systemd/system/sockets.target.wants/docker.socket to /usr/lib/systemd/system/docker.socket.
Created symlink from /etc/systemd/system/multi-user.target.wants/containerd.service to /usr/lib/systemd/system/containerd.service.
在线下载spug-service安装所需的docker镜像,主要有两个,分别是:mariadb 和 openspug/spug-service
[root@wlserver ~]# docker pull mariadb:10.8.2
10.8.2: Pulling from library/mariadb
08c01a0ec47e: Pull complete
a2bcb14c13a1: Pull complete
29c56760f879: Pull complete
a95000a218fc: Pull complete
a765d76e68d9: Pull complete
c6945738f085: Pull complete
62787b7c58c5: Pull complete
85ee39c28fa6: Pull complete
bee45abd643a: Pull complete
b0f20114a997: Pull complete
f59b42092777: Pull complete
Digest: sha256:490f01279be1452f12f497a592112cb960cf0500938dbf0ea3f0135cb6728d3d
Status: Downloaded newer image for mariadb:10.8.2
docker.io/library/mariadb:10.8.2
[root@wlserver ~]# docker pull openspug/spug-service
Using default tag: latest
latest: Pulling from openspug/spug-service
2d473b07cdd5: Pull complete
30fb14a94460: Pull complete
33b193505f30: Pull complete
0dc88a039e58: Pull complete
1e4810fe59b5: Pull complete
b982e1d26912: Pull complete
88ff1bc3c2c8: Pull complete
41f60540c45b: Pull complete
6e51dcaa57e6: Pull complete
aa2124333bc8: Pull complete
390c3ff87a79: Pull complete
4644b9bbf983: Pull complete
8e3abf52ddc8: Pull complete
2a80002b5fd9: Pull complete
Digest: sha256:c238152d00ebee7ecbd59b2ded3067d0c72669446bd39e9c6f79db4f4777731b
Status: Downloaded newer image for openspug/spug-service:latest
docker.io/openspug/spug-service:latest
将docker-compose-2.11.2上传到/usr/local/bin目录下,授予执行权限,并配置环境变量。
[root@wlserver bin]# mv docker-compose-2.11.2 docker-compose
[root@wlserver bin]# chmod u+x docker-compose
[root@wlserver ~]# cat .bash_profile
# .bash_profile

# Get the aliases and functions
if [ -f ~/.bashrc ]; then
        . ~/.bashrc
fi

# User specific environment and startup programs

PATH=$PATH:/usr/local/bin:$HOME/bin

export PATH
[root@wlserver ~]# docker-compose version
Docker Compose version v2.11.2
编辑spug-server.yml,这样如果在这台服务器上运行多个应用,就不会因为docker-compose.yml配置文件名称相同而冲突了。
[root@wlserver ~]# cat spug-server.yml
version: "3.3"
services:
  db:
    image: mariadb:10.8.2
    container_name: spug-db
    restart: always
    command: --port 3306 --character-set-server=utf8mb4 --collation-server=utf8mb4_unicode_ci
    volumes:
      - /data/spug/mysql:/var/lib/mysql
    environment:
      - MYSQL_DATABASE=spug
      - MYSQL_USER=spug
      - MYSQL_PASSWORD=
      - MYSQL_ROOT_PASSWORD=
  spug:
    image: openspug/spug-service
    container_name: spug
    privileged: true
    restart: always
    volumes:
      - /data/spug/service:/data/spug
      - /data/spug/repos:/data/repos
    ports:
      # 如果80端口被占用可替换为其他端口,例如: - "8000:80"
      - "80:80"
    environment:
      - MYSQL_DATABASE=spug
      - MYSQL_USER=spug
      - MYSQL_PASSWORD=
      - MYSQL_HOST=db
      - MYSQL_PORT=3306
    depends_on:
      - db
启动spug-server,一条命令即可,需要使用 -f 参数来指定 yml 文件的位置。
[root@wlserver ~]# docker-compose -f ./spug-server.yml up -d
[+] Running 3/3
 ⠿ Network root_default  Created                                                                                                                    0.1s
 ⠿ Container spug-db     Started                                                                                                                    1.2s
 ⠿ Container spug        Started

[root@wlserver ~]# docker-compose -f ./spug-server.yml ps
NAME                COMMAND                  SERVICE             STATUS              PORTS
spug                "/entrypoint.sh"         spug                running             0.0.0.0:80->80/tcp, :::80->80/tcp
spug-db             "docker-entrypoint.s…"   db                  running             3306/tcp
备注:需要注意80端口有没有被提前占用,如果被占用,那容器里面的80端口映射到宿主机的端口就不能使用80,改为其他未被占用的端口即可。
创建管理员用户
[root@wlserver ~]# docker exec spug init_spug admin Your_Admin_Password
Migrations for 'account':
  data/spug/spug_api/apps/account/migrations/0001_initial.py
    - Create model History
    - Create model Role
    - Create model User
    - Add field created_by to role
Migrations for 'alarm':
  data/spug/spug_api/apps/alarm/migrations/0001_initial.py
    - Create model Alarm
    - Create model Group
    - Create model Contact
Migrations for 'config':
  data/spug/spug_api/apps/config/migrations/0001_initial.py
    - Create model Service
    - Create model Environment
    - Create model ConfigHistory
    - Create model Config
Migrations for 'exec':
  data/spug/spug_api/apps/exec/migrations/0001_initial.py
    - Create model Transfer
    - Create model ExecTemplate
    - Create model ExecHistory
Migrations for 'home':
  data/spug/spug_api/apps/home/migrations/0001_initial.py
    - Create model Navigation
    - Create model Notice
Migrations for 'host':
  data/spug/spug_api/apps/host/migrations/0001_initial.py
    - Create model Host
    - Create model HostExtend
    - Create model Group
Migrations for 'monitor':
  data/spug/spug_api/apps/monitor/migrations/0001_initial.py
    - Create model Detection
Migrations for 'notify':
  data/spug/spug_api/apps/notify/migrations/0001_initial.py
    - Create model Notify
Migrations for 'schedule':
  data/spug/spug_api/apps/schedule/migrations/0001_initial.py
    - Create model History
    - Create model Task
Migrations for 'setting':
  data/spug/spug_api/apps/setting/migrations/0001_initial.py
    - Create model Setting
    - Create model UserSetting
Migrations for 'app':
  data/spug/spug_api/apps/app/migrations/0001_initial.py
    - Create model App
    - Create model Deploy
    - Create model DeployExtend1
    - Create model DeployExtend2
Migrations for 'repository':
  data/spug/spug_api/apps/repository/migrations/0001_initial.py
    - Create model Repository
Migrations for 'deploy':
  data/spug/spug_api/apps/deploy/migrations/0001_initial.py
    - Create model DeployRequest
Operations to perform:
  Apply all migrations: account, alarm, app, config, deploy, exec, home, host, monitor, notify, repository, schedule, setting
Running migrations:
  Applying account.0001_initial... OK
  Applying alarm.0001_initial... OK
  Applying config.0001_initial... OK
  Applying app.0001_initial... OK
  Applying repository.0001_initial... OK
  Applying deploy.0001_initial... OK
  Applying exec.0001_initial... OK
  Applying home.0001_initial... OK
  Applying host.0001_initial... OK
  Applying monitor.0001_initial... OK
  Applying notify.0001_initial... OK
  Applying schedule.0001_initial... OK
  Applying setting.0001_initial... OK
初始化/更新成功
创建用户成功
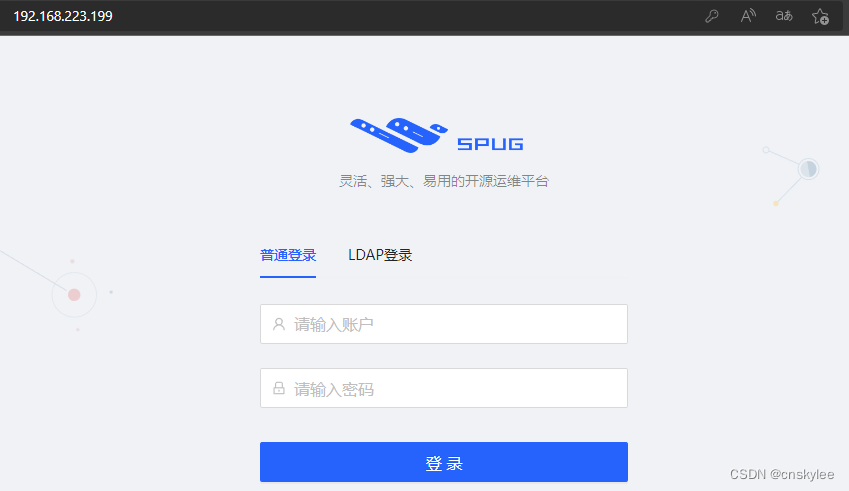
OK,至此spug服务就安装配置完成了。登录页面和登录后的页面如下:


主机管理:

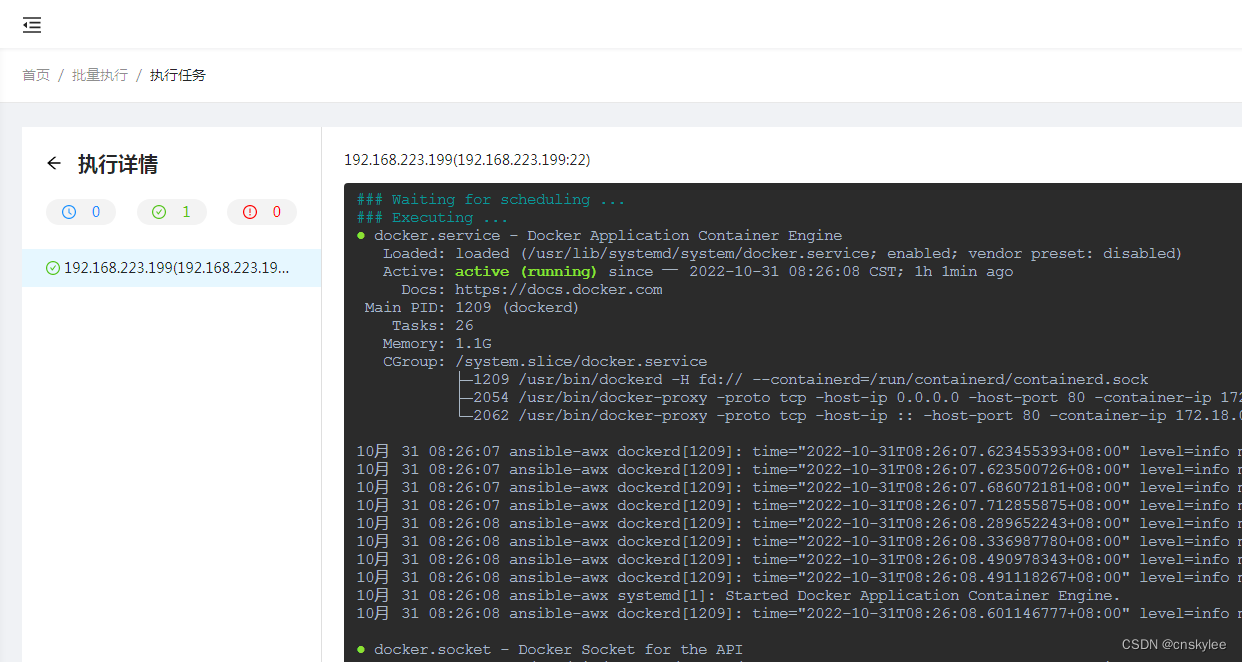
远程命令执行:

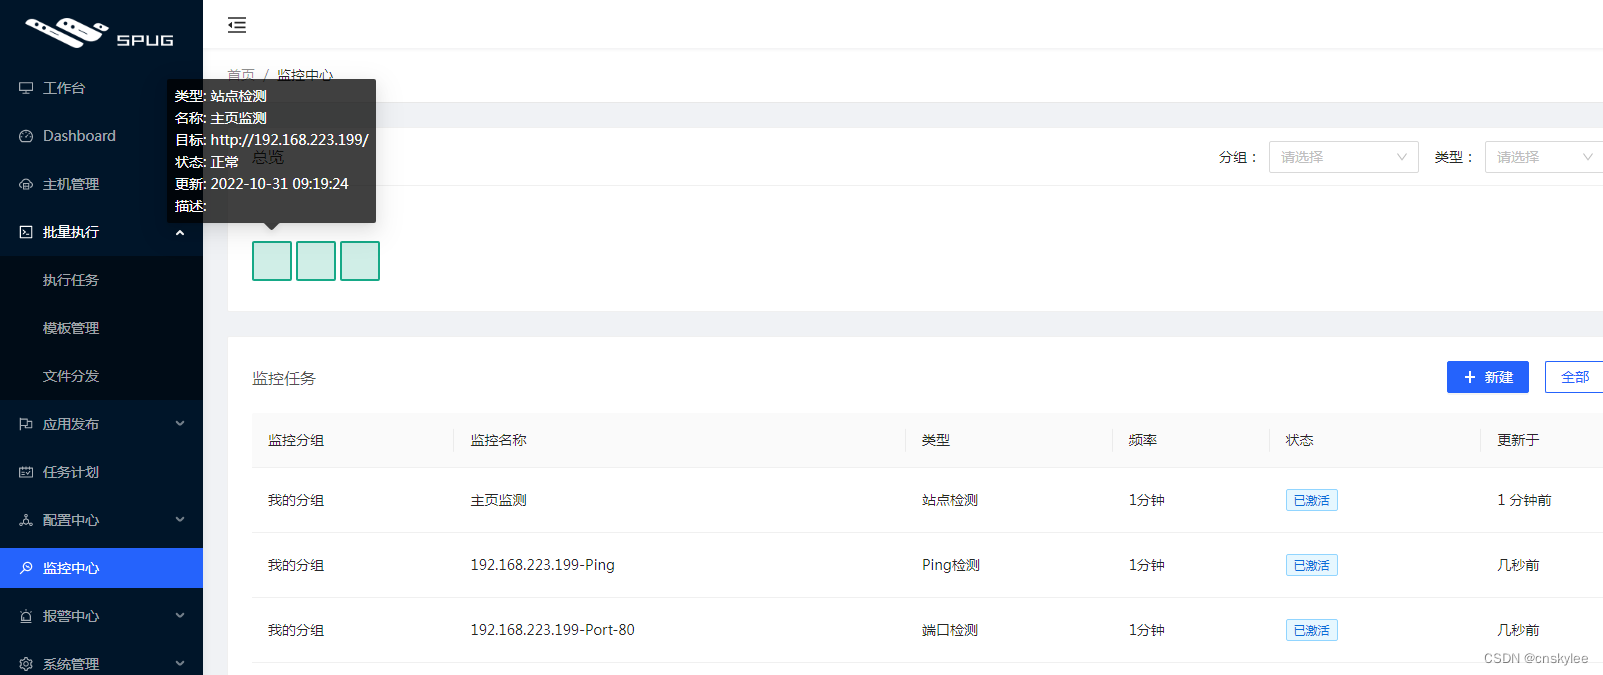
监控中心:


