searchusermenu
  • 发布文章
  • 消息中心
点赞
收藏
评论
分享
原创

JavaScript+HTML+CSS实现12种常见加载画面

2024-08-21 09:43:11
2
0

在现代Web开发中,加载动画不仅可以提升用户体验,还能在后台处理数据时有效地吸引用户注意力。本篇博客将通过原生的JavaScript、HTML和CSS技术,详细介绍12种常见的加载中画面的实现方法。这些动画不仅实用,还可以为我们的Web应用增添一份专业的感觉。


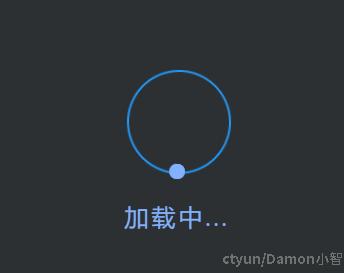
一、光点闪烁

效果描述:
多个小光点按照一定的节奏依次闪烁,形成一种有序的闪烁动画。
001.png

实现思路:

  • 使用<div>元素来表示每个光点。
  • 通过CSS的@keyframes实现闪烁效果。
  • JavaScript控制闪烁的顺序和时间。

HTML代码:

<div class="loading-overlay" id="loadingOverlay">
    <div class="circle-container">
        <div class="circle">
            <div class="dot"></div>
            <div class="dot"></div>
            <div class="dot"></div>
            <div class="dot"></div>
        </div>
    </div>
    <div class="loading-text">加载中...</div>
</div>

CSS代码:

.loading-overlay {
    position: fixed;
    top: 0;
    left: 0;
    width: 100%;
    height: 100%;
    background-color: rgba(0, 0, 0, 0.8);
    display: none;
    justify-content: center;
    align-items: center;
    z-index: 9999;
    flex-direction: column;
}

.circle-container {
    position: relative;
    width: 100px;
    height: 100px;
}

.circle {
    position: absolute;
    width: 100px;
    height: 100px;
    border-radius: 50%;
    border: 2px solid #2196f3;
    animation: rotate-circle 3s infinite linear;
}

.dot {
    position: absolute;
    width: 15px;
    height: 15px;
    background-color: #82b1ff;
    border-radius: 50%;
    top: -7.5px;
    left: 42.5px;
    animation: flash-dot 1s infinite ease-in-out alternate;
}

.dot:nth-child(2) { animation-delay: 0.3s; }
.dot:nth-child(3) { animation-delay: 0.6s; }
.dot:nth-child(4) { animation-delay: 0.9s; }

.loading-text {
    margin-top: 30px;
    font-size: 24px;
    text-transform: uppercase;
    letter-spacing: 3px;
    color: #82b1ff;
}

@keyframes rotate-circle {
    0% { transform: rotate(0deg); }
    100% { transform: rotate(360deg); }
}

@keyframes flash-dot {
    0% { opacity: 0.1; }
    100% { opacity: 1; }
}

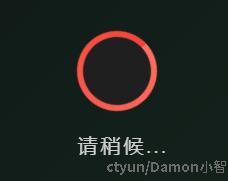
二、加载转圈

效果描述:
一个经典的转圈加载动画,常见于许多网站的加载提示中。
002.png

实现思路:

  • 使用一个容器来包含多个旋转的小方块或小圆点。
  • 通过CSS的transform: rotate属性配合@keyframes实现旋转效果。

HTML代码:

<div class="loading-overlay" id="loadingOverlay">
    <div>
        <div class="loading-animation"></div>
        <div class="loading-text">请稍候...</div>
    </div>
</div>

CSS代码:

.loading-overlay {
    position: fixed;
    top: 0;
    left: 0;
    width: 100%;
    height: 100%;
    background-color: rgba(0, 0, 0, 0.8);
    display: none;
    justify-content: center;
    align-items: center;
    z-index: 9999;
    overflow: hidden;
}

.loading-animation {
    width: 80px;
    height: 80px;
    background: conic-gradient(from 0deg at 50% 50%, #ff6f61 0%, #f44336 100%);
    border-radius: 50%;
    position: relative;
    animation: spin 1.5s linear infinite;
}

.loading-animation::before, .loading-animation::after {
    content: '';
    position: absolute;
    inset: 6px;
    background-color: #1f1f1f;
    border-radius: 50%;
}

.loading-animation::before {
    inset: 10px;
    background: radial-gradient(circle at center, #1f1f1f 0%, #2e2e2e 100%);
    animation: pulse 1.5s ease-in-out infinite;
}

.loading-text {
    margin-top: 20px;
    font-size: 20px;
    text-transform: uppercase;
    letter-spacing: 3px;
    animation: flicker 2s infinite;
}

@keyframes spin {
    0% { transform: rotate(0deg); }
    100% { transform: rotate(360deg); }
}

@keyframes pulse {
    0%, 100% { transform: scale(1); }
    50% { transform: scale(1.1); }
}

@keyframes flicker {
    0%, 100% { opacity: 1; }
    50% { opacity: 0.7; }
}

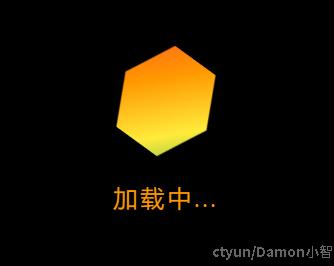
三、渐变旋转

效果描述:
一个带有渐变效果的圆形旋转动画,颜色随着旋转而变化。
003.png

实现思路:

  • 使用一个圆形元素,通过CSS渐变背景和transform实现旋转和颜色变化。

HTML代码:

<div class="loading-overlay" id="loadingOverlay">
    <div class="polygon-container">
        <div class="polygon"></div>
    </div>
    <div class="loading-text">加载中...</div>
</div>

CSS代码:

.loading-overlay {
    position: fixed;
    top: 0;
    left: 0;
    width: 100%;
    height: 100%;
    background-color: rgba(0, 0, 0, 0.8);
    display: none;
    justify-content: center;
    align-items: center;
    z-index: 9999;
    flex-direction: column;
}

.polygon-container {
    width: 100px;
    height: 100px;
    position: relative;
}

.polygon {
    width: 100px;
    height: 100px;
    position: absolute;
    top: 0;
    left: 0;
    background: linear-gradient(45deg, #ff5722, #ff9800, #ffeb3b, #4caf50, #2196f3, #3f51b5, #9c27b0);
    background-size: 400%;
    clip-path: polygon(50% 0%, 100% 25%, 100% 75%, 50% 100%, 0% 75%, 0% 25%);
    animation: rotate-polygon 2s infinite linear, color-shift 4s infinite ease-in-out;
}

.loading-text {
    margin-top: 30px;
    font-size: 24px;
    text-transform: uppercase;
    letter-spacing: 3px;
    color: #ff9800;
}

@keyframes rotate-polygon {
    0% {
        transform: rotate(0deg);
    }
    100% {
        transform: rotate(360deg);
    }
}

@keyframes color-shift {
    0% {
        background-position: 0% 50%;
    }
    100% {
        background-position: 100% 50%;
    }
}

四、扩散波纹

效果描述:
从中心向外扩散的波纹效果,仿佛水滴落在水面。

004.png

实现思路:

  • 使用伪元素::before::after创建波纹。
  • 通过@keyframes实现波纹的扩散效果。

HTML代码:

<div class="loading-overlay" id="loadingOverlay">
    <div class="ripple"></div>
    <div class="loading-text">加载中...</div>
</div>

CSS代码:

.loading-overlay {
    position: fixed;
    top: 0;
    left: 0;
    width: 100%;
    height: 100%;
    background-color: rgba(0, 0, 0, 0.8);
    display: none;
    justify-content: center;
    align-items: center;
    z-index: 9999;
    flex-direction: column;
}

.ripple {
    position: relative;
    width: 80px;
    height: 80px;
    margin-bottom: 20px;
}

.ripple::before, .ripple::after {
    content: '';
    position: absolute;
    border: 4px solid #d1c4e9; /* 浅紫色波纹 */
    border-radius: 50%;
    animation: ripple-animation 1.5s infinite ease-in-out;
    opacity: 0;
    pointer-events: none

;
}

.ripple::before {
    top: 0;
    left: 0;
    right: 0;
    bottom: 0;
    margin: auto;
    width: 100%;
    height: 100%;
}

.ripple::after {
    top: 50%;
    left: 50%;
    width: 0;
    height: 0;
    transform: translate(-50%, -50%);
}

.loading-text {
    font-size: 24px;
    text-transform: uppercase;
    letter-spacing: 3px;
    animation: flicker 2s infinite;
    color: #d1c4e9; /* 浅紫色文字 */
}

@keyframes ripple-animation {
    0% {
        width: 0;
        height: 0;
        opacity: 1;
    }
    100% {
        width: 100%;
        height: 100%;
        opacity: 0;
    }
}

@keyframes flicker {
    0%, 100% { opacity: 1; }
    50% { opacity: 0.7; }
}

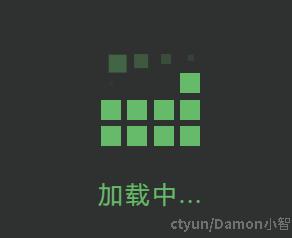
五、起伏方块

效果描述:
多个方块上下起伏,形成一种波浪的动画效果。
005.png

实现思路:

  • 使用多个<div>元素表示方块。
  • 通过CSS的@keyframes控制方块的上下移动。

HTML代码:

<div class="loading-overlay" id="loadingOverlay">
    <div class="grid-container">
        <div class="grid-item"></div>
        <div class="grid-item"></div>
        <div class="grid-item"></div>
        <div class="grid-item"></div>
        <div class="grid-item"></div>
        <div class="grid-item"></div>
        <div class="grid-item"></div>
        <div class="grid-item"></div>
        <div class="grid-item"></div>
        <div class="grid-item"></div>
        <div class="grid-item"></div>
        <div class="grid-item"></div>
        <div class="grid-item"></div>
        <div class="grid-item"></div>
        <div class="grid-item"></div>
        <div class="grid-item"></div>
    </div>
    <div class="loading-text">加载中...</div>
</div>

CSS代码:

.loading-overlay {
    position: fixed;
    top: 0;
    left: 0;
    width: 100%;
    height: 100%;
    background-color: rgba(0, 0, 0, 0.8);
    display: none;
    justify-content: center;
    align-items: center;
    z-index: 9999;
    flex-direction: column;
}

.grid-container {
    width: 100px;
    height: 100px;
    display: grid;
    grid-template-columns: repeat(4, 1fr);
    grid-template-rows: repeat(4, 1fr);
    gap: 5px;
}

.grid-item {
    width: 20px;
    height: 20px;
    background-color: #66bb6a;
    animation: fly-in 2s ease-in-out infinite;
}

.grid-item:nth-child(1) { animation-delay: 0s; }
.grid-item:nth-child(2) { animation-delay: 0.1s; }
.grid-item:nth-child(3) { animation-delay: 0.2s; }
.grid-item:nth-child(4) { animation-delay: 0.3s; }
.grid-item:nth-child(5) { animation-delay: 0.4s; }
.grid-item:nth-child(6) { animation-delay: 0.5s; }
.grid-item:nth-child(7) { animation-delay: 0.6s; }
.grid-item:nth-child(8) { animation-delay: 0.7s; }
.grid-item:nth-child(9) { animation-delay: 0.8s; }
.grid-item:nth-child(10) { animation-delay: 0.9s; }
.grid-item:nth-child(11) { animation-delay: 1s; }
.grid-item:nth-child(12) { animation-delay: 1.1s; }
.grid-item:nth-child(13) { animation-delay: 1.2s; }
.grid-item:nth-child(14) { animation-delay: 1.3s; }
.grid-item:nth-child(15) { animation-delay: 1.4s; }
.grid-item:nth-child(16) { animation-delay: 1.5s; }

.loading-text {
    margin-top: 30px;
    font-size: 24px;
    text-transform: uppercase;
    letter-spacing: 3px;
    color: #66bb6a;
}

@keyframes fly-in {
    0% {
        transform: scale(0) translate(0, 0);
        opacity: 0;
    }
    50% {
        transform: scale(1.2) translate(50%, 50%);
        opacity: 0.5;
    }
    100% {
        transform: scale(1) translate(0, 0);
        opacity: 1;
    }
}

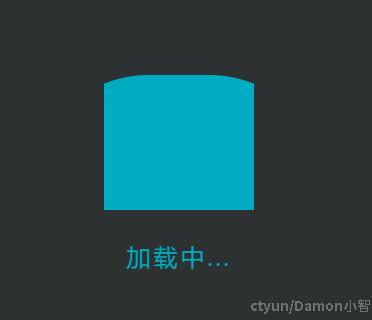
六、升降波浪

效果描述:
一个波浪效果的加载动画,多个元素按照一定的顺序上下移动。
006.png

实现思路:

  • 使用<div>元素作为波浪元素。
  • 通过CSS的transform: translateY配合@keyframes实现波浪动画。

HTML代码:

<div class="loading-overlay" id="loadingOverlay">
    <div class="wave-container">
        <div class="wave"></div>
        <div class="wave"></div>
    </div>
    <div class="loading-text">加载中...</div>
</div>

CSS代码:

.loading-overlay {
    position: fixed;
    top: 0;
    left: 0;
    width: 100%;
    height: 100%;
    background-color: rgba(0, 0, 0, 0.8);
    display: none;
    justify-content: center;
    align-items: center;
    z-index: 9999;
    flex-direction: column;
}

.wave-container {
    width: 150px;
    height: 150px;
    position: relative;
    overflow: hidden;
}

.wave {
    position: absolute;
    top: 100%;
    left: 50%;
    width: 200%;
    height: 200%;
    background-color: #00acc1;
    border-radius: 40%;
    animation: wave-animation 2s infinite ease-in-out;
    transform: translateX(-50%);
}

.wave:nth-child(2) {
    animation-delay: 1s;
}

.loading-text {
    margin-top: 30px;
    font-size: 24px;
    text-transform: uppercase;
    letter-spacing: 3px;
    color: #00acc1;
}

@keyframes wave-animation {
    0% {
        top: 100%;
    }
    50% {
        top: 0;
    }
    100% {
        top: 100%;
    }
}

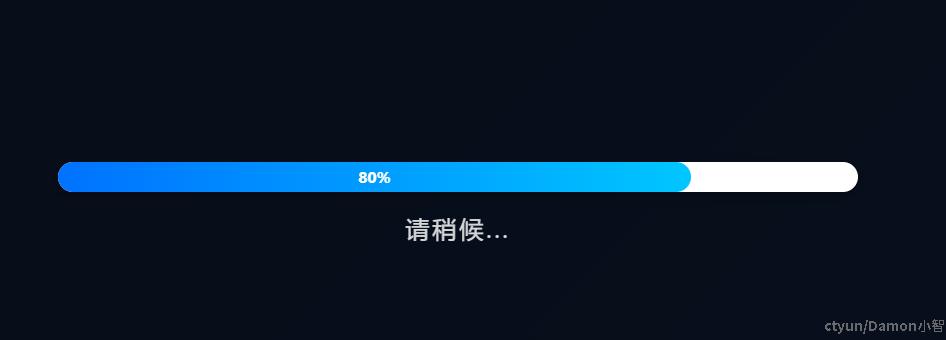
七、水平进度

效果描述:
一个典型的水平加载进度条,适合显示加载进度的情况。
007.png

实现思路:

  • 使用<div>元素作为进度条的容器和进度条本身。
  • 通过CSS的width属性控制进度条的填充。

HTML代码:

<div class="loading-overlay" id="loadingOverlay">
    <div class="progress-bar">
        <div class="progress-bar-fill" id="progressBarFill">0%</div>
    </div>
    <div class="loading-text">请稍候...</div>
</div>

CSS代码:

.loading-overlay {
    position: fixed;
    top: 0;
    left: 0;
    width: 100%;
    height: 100%;
    background-color: rgba(0, 0, 0, 0.8);
    display: none;
    justify-content: center;
    align-items: center;
    z-index: 9999;
    flex-direction: column;
}

.progress-bar {
    width: 80%;
    max-width: 800px;
    background-color: #ffffff;
    border-radius: 35px;
    overflow: hidden;
    box-shadow: 0 4px 10px rgba(0, 0, 0, 0.3);
    height: 30px;
    margin-bottom: 20px;
}

.progress-bar-fill {
    height: 100%;
    width: 0;
    background-color: #00c6ff;
    background-image: linear-gradient(90deg, #0072ff, #00c6ff);
    border-radius: 35px;
    text-align: center;
    color: white;
    line-height: 30px;
    font-size: 16px;
    font-weight: bold;
    transition: width 0.4s ease-in-out;
}

.loading-text {
    font-size: 24px;
    text-transform: uppercase;
    letter-spacing: 3px;
    animation: flicker 2s infinite;
}

@keyframes flicker {
    0%, 100% { opacity: 1; }
    50% { opacity: 0.7; }
}

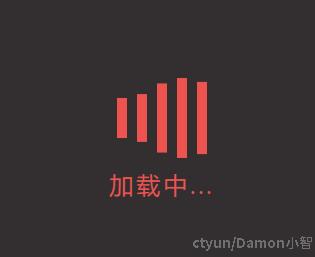
八、条形伸缩

效果描述:
一个不断伸缩的条形动画,常用于加载状态的指示效果。
008.png

实现思路:

  • 使用<div>元素表示条形。
  • 通过CSS的transform: scaleX属性配合@keyframes实现伸缩效果。

HTML代码:

<div class="loading-overlay" id="loadingOverlay">
    <div class="bar-container">
        <div class="bar"></div>
        <div class="bar"></div>
        <div class="bar"></div>
        <div class="bar"></div>
        <div class="bar"></div>
    </div>
    <div class="loading-text">加载中...</div>
</div>

CSS代码:

.loading-overlay {
    position: fixed;
    top: 0;
    left: 0;
    width: 100%;
    height: 100%;
    background-color: rgba(0, 0, 0, 0.8);
    display: none;
    justify-content: center;
    align-items: center;
    z-index: 9999;
    flex-direction: column;
}

.bar-container {
    display: flex;
    justify-content: center;
    align-items: center;
    gap: 10px;
}

.bar {
    width: 10px;
    height: 40px;
    background-color: #ef5350;
    animation: stretch 1.2s infinite ease-in-out;
}

.bar:nth-child(1) {
    animation-delay: 0s;
}

.bar:nth-child(2) {
    animation-delay: 0.2s;
}

.bar:nth-child(3) {
    animation-delay: 0.4s;
}

.bar:nth-child(4) {
    animation-delay: 0.6s;
}

.bar:nth-child(5) {
    animation-delay: 0.8s;
}

.loading-text {
    margin-top: 30px;
    font-size: 24px;
    text-transform: uppercase;
    letter-spacing: 3px;
    color: #ef5350;
}

@keyframes stretch {
    0%, 100% {
        transform: scaleY(1);
    }
    50% {
        transform: scaleY(2);
    }
}

九、跳动点阵

效果描述:
多个小点依次上下跳动,形成一种动态的点阵效果。

009.png

实现思路:

  • 使用多个<div>元素表示点阵中的每个点。
  • 通过CSS的@keyframes控制每个点的上下跳动。

HTML代码:

<div class="loading-overlay" id="loadingOverlay">
    <div class="dot-container">
        <div class="dot"></div>
        <div class="dot"></div>
        <div class="dot"></div>
    </div>
    <div class="loading-text">加载中...</div>
</div>

CSS代码:

.loading-overlay {
    position: fixed;
    top: 0;
    left: 0;
    width: 100%;
    height: 100%;
    background-color: rgba(0, 0, 0, 0.8);
    display: none;
    justify-content: center;
    align-items: center;
    z-index: 9999;
    flex-direction: column;
}

.dot-container {
    display: flex;
    justify-content: center;
    align-items: center;
}

.dot {
    width: 20px;
    height: 20px;
    margin: 0 5px;
    background-color: #ffeb3b;
    border-radius: 50%;
    animation: bounce 1.5s infinite ease-in-out;
}

.dot:nth-child(2) {
    animation-delay: 0.3s;
}

.dot:nth-child(3) {
    animation-delay: 0.6s;
}

.loading-text {
    margin-top: 20px;
    font-size: 24px;
    text-transform: uppercase;
    letter-spacing: 3px;
    color: #ffeb3b;
}

@keyframes bounce {
    0%, 100% {
        transform: translateY(0);
    }
    50% {
        transform: translateY(-15px);
    }
}

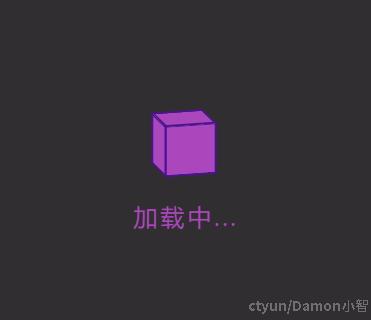
十、旋转方块

效果描述:
多个方块围绕一个中心点进行旋转,常用于表示等待状态。
010.png

实现思路:

  • 使用多个<div>元素表示方块。
  • 通过CSS的transform: rotate@keyframes实现旋转动画。

HTML代码:

<div class="loading-overlay" id="loadingOverlay">
    <div class="cube-container">
        <div class="cube-face front"></div>
        <div class="cube-face back"></div>
        <div class="cube-face right"></div>
        <div class="cube-face left"></div>
        <div class="cube-face top"></div>
        <div class="cube-face bottom"></div>
    </div>
    <div class="loading-text">加载中...</div>
</div>

CSS代码:

.loading-overlay {
    position: fixed;
    top: 0;
    left: 0;
    width: 100%;
    height: 100%;
    background-color: rgba(0, 0, 0, 0.8);
    display: none;
    justify-content: center;
    align-items: center;
    z-index: 9999;
    flex-direction: column;
}

.cube-container {
    width: 50px;
    height: 50px;
    position: relative;
    transform-style: preserve-3d;
    animation: rotate-cube 2s infinite linear;
}

.cube-face {
    position: absolute;
    width: 50px;
    height: 50px;
    background-color: #ab47bc;
    border: 2px solid #4a148c;
}

.cube-face.front  { transform: translateZ(25px); }
.cube-face.back   { transform: rotateY(180deg) translateZ(25px); }
.cube-face.right  { transform: rotateY(90deg) translateZ(25px); }
.cube-face.left   { transform: rotateY(-90deg) translateZ(25px); }
.cube-face.top    { transform: rotateX(90deg) translateZ(25px); }
.cube-face.bottom { transform: rotateX(-90deg) translateZ(25px); }

.loading-text {
    margin-top: 30px;
    font-size: 24px;
    text-transform: uppercase;
    letter-spacing: 3px;
    color: #ab47bc;
}

@keyframes rotate-cube {
    0% { transform: rotateX(0deg) rotateY(0deg); }
    100% { transform: rotateX(360deg) rotateY(360deg); }
}

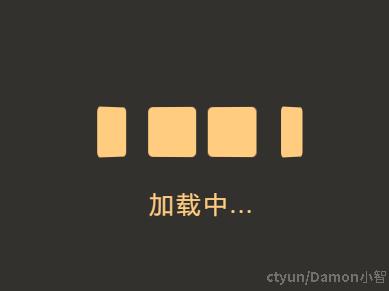
十一、旋转卡片

效果描述:
一个不断翻转的卡片效果,模拟纸牌的翻转动画。
011.png

实现思路:

  • 使用<div>元素表示卡片。
  • 通过CSS的transform: rotateY配合@keyframes实现翻转效果。

HTML代码:

<div class="loading-overlay" id="loadingOverlay">
    <div class="card-container">
        <div class="card"></div>
        <div class="card"></div>
        <div class="card"></div>
        <div class="card"></div>
    </div>
    <div class="loading-text">加载中...</div>
</div>

CSS代码:

.loading-overlay {
    position: fixed;
    top: 0;
    left: 0;
    width: 100%;
    height: 100%;
    background-color: rgba(0, 0, 0, 0.8);
    display: none;
    justify-content: center;
    align-items: center;
    z-index: 9999;
    flex-direction: column;
}

.card-container {
    display: flex;
    justify-content: center;
    align-items: center;
    perspective: 1000px;
}

.card {
    width: 50px;
    height: 50px;
    margin: 0 5px;
    background-color: #ffcc80;
    border-radius: 5px;
    transform-style: preserve-3d;
    transform: rotateY(0deg);
    animation: flip 1.5s infinite ease-in-out;
}

.card:nth-child(2) {
    animation-delay: 0.3s;
}

.card:nth-child(3) {
    animation-delay: 0.6s;
}

.card:nth-child(4) {
    animation-delay: 0.9s;
}

.loading-text {
    margin-top: 30px;
    font-size: 24px;
    text-transform: uppercase;
    letter-spacing: 3px;
    color: #ffcc80;
}

@keyframes flip {
    0%, 100% {
        transform: rotateY(0deg);
    }
    50% {
        transform: rotateY(180deg);
    }
}

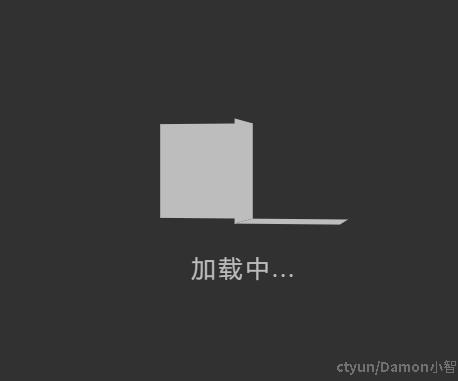
十二、折纸效果

效果描述:
一个像折纸一样的动画效果,模拟纸片的折叠和展开。
012.png

实现思路:

  • 使用

<div>元素表示折纸。

  • 通过CSS的transform: rotateX@keyframes实现折叠和展开的动画。

HTML代码:

<div class="loading-overlay" id="loadingOverlay">
    <div class="paper-container">
        <div class="paper"></div>
    </div>
    <div class="loading-text">加载中...</div>
</div>

CSS代码:

.loading-overlay {
    position: fixed;
    top: 0;
    left: 0;
    width: 100%;
    height: 100%;
    background-color: rgba(0, 0, 0, 0.8);
    display: none;
    justify-content: center;
    align-items: center;
    z-index: 9999;
    flex-direction: column;
}

.paper-container {
    width: 100px;
    height: 100px;
    position: relative;
    perspective: 1000px;
}

.paper {
    width: 100%;
    height: 100%;
    background-color: #bdbdbd;
    position: absolute;
    top: 0;
    left: 0;
    transform-style: preserve-3d;
    animation: fold-unfold 3s infinite ease-in-out;
}

.paper::before, .paper::after {
    content: '';
    position: absolute;
    width: 100%;
    height: 100%;
    background-color: inherit;
    transform-origin: top left;
}

.paper::before {
    transform: rotateY(90deg);
    right: 0;
}

.paper::after {
    transform: rotateX(90deg);
    bottom: 0;
}

.loading-text {
    margin-top: 30px;
    font-size: 24px;
    text-transform: uppercase;
    letter-spacing: 3px;
    color: #bdbdbd;
}

@keyframes fold-unfold {
    0%, 100% {
        transform: rotateX(0) rotateY(0);
    }
    25% {
        transform: rotateX(180deg) rotateY(0);
    }
    50% {
        transform: rotateX(180deg) rotateY(180deg);
    }
    75% {
        transform: rotateX(0) rotateY(180deg);
    }
}

十三、总结

在现代Web开发中,加载动画不仅提升了用户体验,还在后台处理数据时有效地吸引了用户注意力。本文通过原生的JavaScript、HTML和CSS技术,详细介绍了12种常见的加载中动画效果。这些动画效果各具特色,从简单的光点闪烁到复杂的折纸效果,涵盖了多种设计需求。

通过学习和实践这些动画实现方法,我们可以轻松将它们应用到Web项目中,不仅美化了页面,还可以为用户带来更好的互动体验。由于这些动画都是使用纯CSS和少量JavaScript实现的,无需依赖第三方库,兼容性好且易于维护。

0条评论
0 / 1000
Damon小智
11文章数
0粉丝数
Damon小智
11 文章 | 0 粉丝
原创

JavaScript+HTML+CSS实现12种常见加载画面

2024-08-21 09:43:11
2
0

在现代Web开发中,加载动画不仅可以提升用户体验,还能在后台处理数据时有效地吸引用户注意力。本篇博客将通过原生的JavaScript、HTML和CSS技术,详细介绍12种常见的加载中画面的实现方法。这些动画不仅实用,还可以为我们的Web应用增添一份专业的感觉。


一、光点闪烁

效果描述:
多个小光点按照一定的节奏依次闪烁,形成一种有序的闪烁动画。

001.png

实现思路:

  • 使用<div>元素来表示每个光点。
  • 通过CSS的@keyframes实现闪烁效果。
  • JavaScript控制闪烁的顺序和时间。

HTML代码:

<div class="loading-overlay" id="loadingOverlay">
    <div class="circle-container">
        <div class="circle">
            <div class="dot"></div>
            <div class="dot"></div>
            <div class="dot"></div>
            <div class="dot"></div>
        </div>
    </div>
    <div class="loading-text">加载中...</div>
</div>

CSS代码:

.loading-overlay {
    position: fixed;
    top: 0;
    left: 0;
    width: 100%;
    height: 100%;
    background-color: rgba(0, 0, 0, 0.8);
    display: none;
    justify-content: center;
    align-items: center;
    z-index: 9999;
    flex-direction: column;
}

.circle-container {
    position: relative;
    width: 100px;
    height: 100px;
}

.circle {
    position: absolute;
    width: 100px;
    height: 100px;
    border-radius: 50%;
    border: 2px solid #2196f3;
    animation: rotate-circle 3s infinite linear;
}

.dot {
    position: absolute;
    width: 15px;
    height: 15px;
    background-color: #82b1ff;
    border-radius: 50%;
    top: -7.5px;
    left: 42.5px;
    animation: flash-dot 1s infinite ease-in-out alternate;
}

.dot:nth-child(2) { animation-delay: 0.3s; }
.dot:nth-child(3) { animation-delay: 0.6s; }
.dot:nth-child(4) { animation-delay: 0.9s; }

.loading-text {
    margin-top: 30px;
    font-size: 24px;
    text-transform: uppercase;
    letter-spacing: 3px;
    color: #82b1ff;
}

@keyframes rotate-circle {
    0% { transform: rotate(0deg); }
    100% { transform: rotate(360deg); }
}

@keyframes flash-dot {
    0% { opacity: 0.1; }
    100% { opacity: 1; }
}

二、加载转圈

效果描述:
一个经典的转圈加载动画,常见于许多网站的加载提示中。

002.png

实现思路:

  • 使用一个容器来包含多个旋转的小方块或小圆点。
  • 通过CSS的transform: rotate属性配合@keyframes实现旋转效果。

HTML代码:

<div class="loading-overlay" id="loadingOverlay">
    <div>
        <div class="loading-animation"></div>
        <div class="loading-text">请稍候...</div>
    </div>
</div>

CSS代码:

.loading-overlay {
    position: fixed;
    top: 0;
    left: 0;
    width: 100%;
    height: 100%;
    background-color: rgba(0, 0, 0, 0.8);
    display: none;
    justify-content: center;
    align-items: center;
    z-index: 9999;
    overflow: hidden;
}

.loading-animation {
    width: 80px;
    height: 80px;
    background: conic-gradient(from 0deg at 50% 50%, #ff6f61 0%, #f44336 100%);
    border-radius: 50%;
    position: relative;
    animation: spin 1.5s linear infinite;
}

.loading-animation::before, .loading-animation::after {
    content: '';
    position: absolute;
    inset: 6px;
    background-color: #1f1f1f;
    border-radius: 50%;
}

.loading-animation::before {
    inset: 10px;
    background: radial-gradient(circle at center, #1f1f1f 0%, #2e2e2e 100%);
    animation: pulse 1.5s ease-in-out infinite;
}

.loading-text {
    margin-top: 20px;
    font-size: 20px;
    text-transform: uppercase;
    letter-spacing: 3px;
    animation: flicker 2s infinite;
}

@keyframes spin {
    0% { transform: rotate(0deg); }
    100% { transform: rotate(360deg); }
}

@keyframes pulse {
    0%, 100% { transform: scale(1); }
    50% { transform: scale(1.1); }
}

@keyframes flicker {
    0%, 100% { opacity: 1; }
    50% { opacity: 0.7; }
}

三、渐变旋转

效果描述:
一个带有渐变效果的圆形旋转动画,颜色随着旋转而变化。

003.png

实现思路:

  • 使用一个圆形元素,通过CSS渐变背景和transform实现旋转和颜色变化。

HTML代码:

<div class="loading-overlay" id="loadingOverlay">
    <div class="polygon-container">
        <div class="polygon"></div>
    </div>
    <div class="loading-text">加载中...</div>
</div>

CSS代码:

.loading-overlay {
    position: fixed;
    top: 0;
    left: 0;
    width: 100%;
    height: 100%;
    background-color: rgba(0, 0, 0, 0.8);
    display: none;
    justify-content: center;
    align-items: center;
    z-index: 9999;
    flex-direction: column;
}

.polygon-container {
    width: 100px;
    height: 100px;
    position: relative;
}

.polygon {
    width: 100px;
    height: 100px;
    position: absolute;
    top: 0;
    left: 0;
    background: linear-gradient(45deg, #ff5722, #ff9800, #ffeb3b, #4caf50, #2196f3, #3f51b5, #9c27b0);
    background-size: 400%;
    clip-path: polygon(50% 0%, 100% 25%, 100% 75%, 50% 100%, 0% 75%, 0% 25%);
    animation: rotate-polygon 2s infinite linear, color-shift 4s infinite ease-in-out;
}

.loading-text {
    margin-top: 30px;
    font-size: 24px;
    text-transform: uppercase;
    letter-spacing: 3px;
    color: #ff9800;
}

@keyframes rotate-polygon {
    0% {
        transform: rotate(0deg);
    }
    100% {
        transform: rotate(360deg);
    }
}

@keyframes color-shift {
    0% {
        background-position: 0% 50%;
    }
    100% {
        background-position: 100% 50%;
    }
}

四、扩散波纹

效果描述:
从中心向外扩散的波纹效果,仿佛水滴落在水面。

004.png

实现思路:

  • 使用伪元素::before::after创建波纹。
  • 通过@keyframes实现波纹的扩散效果。

HTML代码:

<div class="loading-overlay" id="loadingOverlay">
    <div class="ripple"></div>
    <div class="loading-text">加载中...</div>
</div>

CSS代码:

.loading-overlay {
    position: fixed;
    top: 0;
    left: 0;
    width: 100%;
    height: 100%;
    background-color: rgba(0, 0, 0, 0.8);
    display: none;
    justify-content: center;
    align-items: center;
    z-index: 9999;
    flex-direction: column;
}

.ripple {
    position: relative;
    width: 80px;
    height: 80px;
    margin-bottom: 20px;
}

.ripple::before, .ripple::after {
    content: '';
    position: absolute;
    border: 4px solid #d1c4e9; /* 浅紫色波纹 */
    border-radius: 50%;
    animation: ripple-animation 1.5s infinite ease-in-out;
    opacity: 0;
    pointer-events: none

;
}

.ripple::before {
    top: 0;
    left: 0;
    right: 0;
    bottom: 0;
    margin: auto;
    width: 100%;
    height: 100%;
}

.ripple::after {
    top: 50%;
    left: 50%;
    width: 0;
    height: 0;
    transform: translate(-50%, -50%);
}

.loading-text {
    font-size: 24px;
    text-transform: uppercase;
    letter-spacing: 3px;
    animation: flicker 2s infinite;
    color: #d1c4e9; /* 浅紫色文字 */
}

@keyframes ripple-animation {
    0% {
        width: 0;
        height: 0;
        opacity: 1;
    }
    100% {
        width: 100%;
        height: 100%;
        opacity: 0;
    }
}

@keyframes flicker {
    0%, 100% { opacity: 1; }
    50% { opacity: 0.7; }
}

五、起伏方块

效果描述:
多个方块上下起伏,形成一种波浪的动画效果。

005.png

实现思路:

  • 使用多个<div>元素表示方块。
  • 通过CSS的@keyframes控制方块的上下移动。

HTML代码:

<div class="loading-overlay" id="loadingOverlay">
    <div class="grid-container">
        <div class="grid-item"></div>
        <div class="grid-item"></div>
        <div class="grid-item"></div>
        <div class="grid-item"></div>
        <div class="grid-item"></div>
        <div class="grid-item"></div>
        <div class="grid-item"></div>
        <div class="grid-item"></div>
        <div class="grid-item"></div>
        <div class="grid-item"></div>
        <div class="grid-item"></div>
        <div class="grid-item"></div>
        <div class="grid-item"></div>
        <div class="grid-item"></div>
        <div class="grid-item"></div>
        <div class="grid-item"></div>
    </div>
    <div class="loading-text">加载中...</div>
</div>

CSS代码:

.loading-overlay {
    position: fixed;
    top: 0;
    left: 0;
    width: 100%;
    height: 100%;
    background-color: rgba(0, 0, 0, 0.8);
    display: none;
    justify-content: center;
    align-items: center;
    z-index: 9999;
    flex-direction: column;
}

.grid-container {
    width: 100px;
    height: 100px;
    display: grid;
    grid-template-columns: repeat(4, 1fr);
    grid-template-rows: repeat(4, 1fr);
    gap: 5px;
}

.grid-item {
    width: 20px;
    height: 20px;
    background-color: #66bb6a;
    animation: fly-in 2s ease-in-out infinite;
}

.grid-item:nth-child(1) { animation-delay: 0s; }
.grid-item:nth-child(2) { animation-delay: 0.1s; }
.grid-item:nth-child(3) { animation-delay: 0.2s; }
.grid-item:nth-child(4) { animation-delay: 0.3s; }
.grid-item:nth-child(5) { animation-delay: 0.4s; }
.grid-item:nth-child(6) { animation-delay: 0.5s; }
.grid-item:nth-child(7) { animation-delay: 0.6s; }
.grid-item:nth-child(8) { animation-delay: 0.7s; }
.grid-item:nth-child(9) { animation-delay: 0.8s; }
.grid-item:nth-child(10) { animation-delay: 0.9s; }
.grid-item:nth-child(11) { animation-delay: 1s; }
.grid-item:nth-child(12) { animation-delay: 1.1s; }
.grid-item:nth-child(13) { animation-delay: 1.2s; }
.grid-item:nth-child(14) { animation-delay: 1.3s; }
.grid-item:nth-child(15) { animation-delay: 1.4s; }
.grid-item:nth-child(16) { animation-delay: 1.5s; }

.loading-text {
    margin-top: 30px;
    font-size: 24px;
    text-transform: uppercase;
    letter-spacing: 3px;
    color: #66bb6a;
}

@keyframes fly-in {
    0% {
        transform: scale(0) translate(0, 0);
        opacity: 0;
    }
    50% {
        transform: scale(1.2) translate(50%, 50%);
        opacity: 0.5;
    }
    100% {
        transform: scale(1) translate(0, 0);
        opacity: 1;
    }
}

六、升降波浪

效果描述:
一个波浪效果的加载动画,多个元素按照一定的顺序上下移动。

006.png

实现思路:

  • 使用<div>元素作为波浪元素。
  • 通过CSS的transform: translateY配合@keyframes实现波浪动画。

HTML代码:

<div class="loading-overlay" id="loadingOverlay">
    <div class="wave-container">
        <div class="wave"></div>
        <div class="wave"></div>
    </div>
    <div class="loading-text">加载中...</div>
</div>

CSS代码:

.loading-overlay {
    position: fixed;
    top: 0;
    left: 0;
    width: 100%;
    height: 100%;
    background-color: rgba(0, 0, 0, 0.8);
    display: none;
    justify-content: center;
    align-items: center;
    z-index: 9999;
    flex-direction: column;
}

.wave-container {
    width: 150px;
    height: 150px;
    position: relative;
    overflow: hidden;
}

.wave {
    position: absolute;
    top: 100%;
    left: 50%;
    width: 200%;
    height: 200%;
    background-color: #00acc1;
    border-radius: 40%;
    animation: wave-animation 2s infinite ease-in-out;
    transform: translateX(-50%);
}

.wave:nth-child(2) {
    animation-delay: 1s;
}

.loading-text {
    margin-top: 30px;
    font-size: 24px;
    text-transform: uppercase;
    letter-spacing: 3px;
    color: #00acc1;
}

@keyframes wave-animation {
    0% {
        top: 100%;
    }
    50% {
        top: 0;
    }
    100% {
        top: 100%;
    }
}

七、水平进度

效果描述:
一个典型的水平加载进度条,适合显示加载进度的情况。

007.png

实现思路:

  • 使用<div>元素作为进度条的容器和进度条本身。
  • 通过CSS的width属性控制进度条的填充。

HTML代码:

<div class="loading-overlay" id="loadingOverlay">
    <div class="progress-bar">
        <div class="progress-bar-fill" id="progressBarFill">0%</div>
    </div>
    <div class="loading-text">请稍候...</div>
</div>

CSS代码:

.loading-overlay {
    position: fixed;
    top: 0;
    left: 0;
    width: 100%;
    height: 100%;
    background-color: rgba(0, 0, 0, 0.8);
    display: none;
    justify-content: center;
    align-items: center;
    z-index: 9999;
    flex-direction: column;
}

.progress-bar {
    width: 80%;
    max-width: 800px;
    background-color: #ffffff;
    border-radius: 35px;
    overflow: hidden;
    box-shadow: 0 4px 10px rgba(0, 0, 0, 0.3);
    height: 30px;
    margin-bottom: 20px;
}

.progress-bar-fill {
    height: 100%;
    width: 0;
    background-color: #00c6ff;
    background-image: linear-gradient(90deg, #0072ff, #00c6ff);
    border-radius: 35px;
    text-align: center;
    color: white;
    line-height: 30px;
    font-size: 16px;
    font-weight: bold;
    transition: width 0.4s ease-in-out;
}

.loading-text {
    font-size: 24px;
    text-transform: uppercase;
    letter-spacing: 3px;
    animation: flicker 2s infinite;
}

@keyframes flicker {
    0%, 100% { opacity: 1; }
    50% { opacity: 0.7; }
}

八、条形伸缩

效果描述:
一个不断伸缩的条形动画,常用于加载状态的指示效果。

008.png

实现思路:

  • 使用<div>元素表示条形。
  • 通过CSS的transform: scaleX属性配合@keyframes实现伸缩效果。

HTML代码:

<div class="loading-overlay" id="loadingOverlay">
    <div class="bar-container">
        <div class="bar"></div>
        <div class="bar"></div>
        <div class="bar"></div>
        <div class="bar"></div>
        <div class="bar"></div>
    </div>
    <div class="loading-text">加载中...</div>
</div>

CSS代码:

.loading-overlay {
    position: fixed;
    top: 0;
    left: 0;
    width: 100%;
    height: 100%;
    background-color: rgba(0, 0, 0, 0.8);
    display: none;
    justify-content: center;
    align-items: center;
    z-index: 9999;
    flex-direction: column;
}

.bar-container {
    display: flex;
    justify-content: center;
    align-items: center;
    gap: 10px;
}

.bar {
    width: 10px;
    height: 40px;
    background-color: #ef5350;
    animation: stretch 1.2s infinite ease-in-out;
}

.bar:nth-child(1) {
    animation-delay: 0s;
}

.bar:nth-child(2) {
    animation-delay: 0.2s;
}

.bar:nth-child(3) {
    animation-delay: 0.4s;
}

.bar:nth-child(4) {
    animation-delay: 0.6s;
}

.bar:nth-child(5) {
    animation-delay: 0.8s;
}

.loading-text {
    margin-top: 30px;
    font-size: 24px;
    text-transform: uppercase;
    letter-spacing: 3px;
    color: #ef5350;
}

@keyframes stretch {
    0%, 100% {
        transform: scaleY(1);
    }
    50% {
        transform: scaleY(2);
    }
}

九、跳动点阵

效果描述:
多个小点依次上下跳动,形成一种动态的点阵效果。

009.png

实现思路:

  • 使用多个<div>元素表示点阵中的每个点。
  • 通过CSS的@keyframes控制每个点的上下跳动。

HTML代码:

<div class="loading-overlay" id="loadingOverlay">
    <div class="dot-container">
        <div class="dot"></div>
        <div class="dot"></div>
        <div class="dot"></div>
    </div>
    <div class="loading-text">加载中...</div>
</div>

CSS代码:

.loading-overlay {
    position: fixed;
    top: 0;
    left: 0;
    width: 100%;
    height: 100%;
    background-color: rgba(0, 0, 0, 0.8);
    display: none;
    justify-content: center;
    align-items: center;
    z-index: 9999;
    flex-direction: column;
}

.dot-container {
    display: flex;
    justify-content: center;
    align-items: center;
}

.dot {
    width: 20px;
    height: 20px;
    margin: 0 5px;
    background-color: #ffeb3b;
    border-radius: 50%;
    animation: bounce 1.5s infinite ease-in-out;
}

.dot:nth-child(2) {
    animation-delay: 0.3s;
}

.dot:nth-child(3) {
    animation-delay: 0.6s;
}

.loading-text {
    margin-top: 20px;
    font-size: 24px;
    text-transform: uppercase;
    letter-spacing: 3px;
    color: #ffeb3b;
}

@keyframes bounce {
    0%, 100% {
        transform: translateY(0);
    }
    50% {
        transform: translateY(-15px);
    }
}

十、旋转方块

效果描述:
多个方块围绕一个中心点进行旋转,常用于表示等待状态。

010.png

实现思路:

  • 使用多个<div>元素表示方块。
  • 通过CSS的transform: rotate@keyframes实现旋转动画。

HTML代码:

<div class="loading-overlay" id="loadingOverlay">
    <div class="cube-container">
        <div class="cube-face front"></div>
        <div class="cube-face back"></div>
        <div class="cube-face right"></div>
        <div class="cube-face left"></div>
        <div class="cube-face top"></div>
        <div class="cube-face bottom"></div>
    </div>
    <div class="loading-text">加载中...</div>
</div>

CSS代码:

.loading-overlay {
    position: fixed;
    top: 0;
    left: 0;
    width: 100%;
    height: 100%;
    background-color: rgba(0, 0, 0, 0.8);
    display: none;
    justify-content: center;
    align-items: center;
    z-index: 9999;
    flex-direction: column;
}

.cube-container {
    width: 50px;
    height: 50px;
    position: relative;
    transform-style: preserve-3d;
    animation: rotate-cube 2s infinite linear;
}

.cube-face {
    position: absolute;
    width: 50px;
    height: 50px;
    background-color: #ab47bc;
    border: 2px solid #4a148c;
}

.cube-face.front  { transform: translateZ(25px); }
.cube-face.back   { transform: rotateY(180deg) translateZ(25px); }
.cube-face.right  { transform: rotateY(90deg) translateZ(25px); }
.cube-face.left   { transform: rotateY(-90deg) translateZ(25px); }
.cube-face.top    { transform: rotateX(90deg) translateZ(25px); }
.cube-face.bottom { transform: rotateX(-90deg) translateZ(25px); }

.loading-text {
    margin-top: 30px;
    font-size: 24px;
    text-transform: uppercase;
    letter-spacing: 3px;
    color: #ab47bc;
}

@keyframes rotate-cube {
    0% { transform: rotateX(0deg) rotateY(0deg); }
    100% { transform: rotateX(360deg) rotateY(360deg); }
}

十一、旋转卡片

效果描述:
一个不断翻转的卡片效果,模拟纸牌的翻转动画。

011.png

实现思路:

  • 使用<div>元素表示卡片。
  • 通过CSS的transform: rotateY配合@keyframes实现翻转效果。

HTML代码:

<div class="loading-overlay" id="loadingOverlay">
    <div class="card-container">
        <div class="card"></div>
        <div class="card"></div>
        <div class="card"></div>
        <div class="card"></div>
    </div>
    <div class="loading-text">加载中...</div>
</div>

CSS代码:

.loading-overlay {
    position: fixed;
    top: 0;
    left: 0;
    width: 100%;
    height: 100%;
    background-color: rgba(0, 0, 0, 0.8);
    display: none;
    justify-content: center;
    align-items: center;
    z-index: 9999;
    flex-direction: column;
}

.card-container {
    display: flex;
    justify-content: center;
    align-items: center;
    perspective: 1000px;
}

.card {
    width: 50px;
    height: 50px;
    margin: 0 5px;
    background-color: #ffcc80;
    border-radius: 5px;
    transform-style: preserve-3d;
    transform: rotateY(0deg);
    animation: flip 1.5s infinite ease-in-out;
}

.card:nth-child(2) {
    animation-delay: 0.3s;
}

.card:nth-child(3) {
    animation-delay: 0.6s;
}

.card:nth-child(4) {
    animation-delay: 0.9s;
}

.loading-text {
    margin-top: 30px;
    font-size: 24px;
    text-transform: uppercase;
    letter-spacing: 3px;
    color: #ffcc80;
}

@keyframes flip {
    0%, 100% {
        transform: rotateY(0deg);
    }
    50% {
        transform: rotateY(180deg);
    }
}

十二、折纸效果

效果描述:
一个像折纸一样的动画效果,模拟纸片的折叠和展开。

012.png

实现思路:

  • 使用

<div>元素表示折纸。

  • 通过CSS的transform: rotateX@keyframes实现折叠和展开的动画。

HTML代码:

<div class="loading-overlay" id="loadingOverlay">
    <div class="paper-container">
        <div class="paper"></div>
    </div>
    <div class="loading-text">加载中...</div>
</div>

CSS代码:

.loading-overlay {
    position: fixed;
    top: 0;
    left: 0;
    width: 100%;
    height: 100%;
    background-color: rgba(0, 0, 0, 0.8);
    display: none;
    justify-content: center;
    align-items: center;
    z-index: 9999;
    flex-direction: column;
}

.paper-container {
    width: 100px;
    height: 100px;
    position: relative;
    perspective: 1000px;
}

.paper {
    width: 100%;
    height: 100%;
    background-color: #bdbdbd;
    position: absolute;
    top: 0;
    left: 0;
    transform-style: preserve-3d;
    animation: fold-unfold 3s infinite ease-in-out;
}

.paper::before, .paper::after {
    content: '';
    position: absolute;
    width: 100%;
    height: 100%;
    background-color: inherit;
    transform-origin: top left;
}

.paper::before {
    transform: rotateY(90deg);
    right: 0;
}

.paper::after {
    transform: rotateX(90deg);
    bottom: 0;
}

.loading-text {
    margin-top: 30px;
    font-size: 24px;
    text-transform: uppercase;
    letter-spacing: 3px;
    color: #bdbdbd;
}

@keyframes fold-unfold {
    0%, 100% {
        transform: rotateX(0) rotateY(0);
    }
    25% {
        transform: rotateX(180deg) rotateY(0);
    }
    50% {
        transform: rotateX(180deg) rotateY(180deg);
    }
    75% {
        transform: rotateX(0) rotateY(180deg);
    }
}

十三、总结

在现代Web开发中,加载动画不仅提升了用户体验,还在后台处理数据时有效地吸引了用户注意力。本文通过原生的JavaScript、HTML和CSS技术,详细介绍了12种常见的加载中动画效果。这些动画效果各具特色,从简单的光点闪烁到复杂的折纸效果,涵盖了多种设计需求。

通过学习和实践这些动画实现方法,我们可以轻松将它们应用到Web项目中,不仅美化了页面,还可以为用户带来更好的互动体验。由于这些动画都是使用纯CSS和少量JavaScript实现的,无需依赖第三方库,兼容性好且易于维护。

文章来自个人专栏
开发技术分享
11 文章 | 1 订阅
0条评论
0 / 1000
请输入你的评论
0
0