一、Cobbler简介
1.1简介
- Cobbler是一款Linux生态的自动化运维工具,基于Python2开发,用于自动化批量部署安装操作系统;其提供基于CLI的管理方式和WEB配置界面,其中WEB配置界面是基于Python2和Django框架开发。另外,cobbler还提供了API,方便二次开发。当然,Cobbler属于C/S模型(客户端/服务器模型)
- Cobbler主要用于快速网络安装linux操作系统,支持众多的Linux发行版如:Red Hat、Fedora、CentOS、Debian、Ubuntu和SuSE等。
- 在cobbler之前,微软曾开发过另一项类似的基于C/S工作模式的技术PXE(Prebot eXecuteEnvironment,预启动执行环境),Cobbler实质是PXE的二次封装,将多种安装参数封装到一起,并提供统一的管理方法。
- 使用Cobbler安装系统需要一台专门提供各种服务的服务器,提供的服务包括(HTTP/FTP/NFS,TFTP,DHCP),也可以将这几个服务分别部署到不同服务器。事实上在实际应用中,总是将不同的服务分别部署到专门的服务器。
1.2 Cobbler工作流程
Cobbler 的工作流程包括多个步骤,以下是其中几个关键步骤的解释:
- 服务启动:这一步指的是启动 Cobbler 服务本身。Cobbler 是一个基于服务的工具,需要在服务器上运行以提供自动化操作系统安装的功能。
- Sync 更新:这一步涉及同步更新,通常是指将 Cobbler 服务器上的操作系统镜像、软件包等文件与操作系统供应商或其他资源同步。这可以确保 Cobbler 服务器上的文件与最新版本保持一致,以便在安装时提供最新的操作系统。
- 拷贝 TFTP 文件:TFTP(Trivial File Transfer Protocol)是用于传输引导文件的协议,这一步是将引导文件拷贝到 TFTP 服务器上,以便客户端可以通过网络引导并获取这些文件。
- 启动 DHCPD:在 Cobbler 中,DHCPD 是 DHCP 服务器的守护进程,用于为客户端分配IP地址和其他网络配置信息。在这一步,Cobbler 可能会启动 DHCP 服务器,以便客户端在引导时能够获取所需的网络配置。
- 报告信息:这一步通常包括向管理员或其他系统中的日志文件报告信息,以便跟踪自动化安装过程的进展和问题。这有助于管理员监视和管理自动化部署。
- client裸机配置了从网络启动后,开机后会广播包请求DHCP服务器(cobbler server)发送其分配好的一个IP。
- DHCP服务器(cobbler server)收到请求后发送responese,包括其ip地址。
- client裸机拿到ip后再向cobbler server发送请求OS引导文件的请求。
- cobbler server告诉裸机OS引导文件的名字和TFTP server的ip和port。
- client裸机通过上面告知的TFTP server地址通信,下载引导文件。
- client裸机执行执行该引导文件,确定加载信息,选择要安装的os,期间会再向cobbler server请求kickstart文件和os image。
- cobbler server发送请求的kickstart和os iamge。
- client裸机加载kickstart文件。
- client裸机接收os image,安装该os image。
1.3 Cobbler和PXE的区别
Cobbler 和 PXE(Preboot Execution Environment)是两个不同的概念,但通常一起使用以实现自动化操作系统安装。以下是它们之间的主要区别:
- Cobbler 和 PXE 通常结合使用,以实现自动化操作系统安装。Cobbler负责配置、管理操作系统镜像、Kickstart文件、系统定义和其他配置,同时还提供了DHCP、TFTP、HTTP和NFS等服务以支持PXE引导。PXE引导是在客户端启动时发生的,它请求DHCP信息和TFTP引导文件,这些引导文件通常由Cobbler服务器提供。
- 总的来说,Cobbler提供了更高级的自动化安装和配置功能,而PXE则是一种网络引导协议,用于在客户端启动时获取引导文件。它们一起协作,使自动化操作系统安装更加方便和高效。
- pxe + kickstart 已经可以解决网络批量装机的问题, 但是环境配置过于复杂, 而且仅针对某一个版本的操作系统进行批量安装, 无法满足目前复杂环境的部署需求,cobbler 是基于pxe + kickstart技术的二次封装, 简化了安装部署流程, 增加了对多发行版的支持,极大方便了初级人员的学习和使用。
二.Cobbler服务器搭建
2.1 环境准备
2.1.1 建立虚拟机
在virtual box中新建一台虚拟机并装机为centos7,其中网卡配置为2块,网卡1为仅主机通信(用于服务端与客户端通信),网卡2为NAT通信(用于与外网相连,下载安装包)
2.1.2 关闭防火墙
systemctl stop firewalld
systemctl disable firewalld
#关闭selinux
setenforce 0
sed -i 's/SELINUX=enforcing/SELINUX=disabled/g' /etc/sysconfig/selinux
2.1.3 配置yum源
rpm -ql epel-release >> /dev/nul || yum install -y epel-release
2.2 安装cobbler和相关软件
2.2.1 安装软件
yum -y install cobbler cobbler-web tftp-server dhcp httpd xinetd
2.2.2 设置开机自动启动
systemctl start httpd cobblerd
systemctl enable httpd cobblerd
#dhcpd 我们修改配置文件后再启动
2.2.3 配置cobbler配置文件
使用 cobbler check命令可以检查还有哪些配置项需要进行修改, 结果如下 , 我们依次解决下面8个问题 :
[root@localhost ~]# cobbler check
The following are potential configuration items that you may want to fix:
1 : The 'server' field in /etc/cobbler/settings must be set to something other than localhost, or kickstarting features will not work. This should be a resol vable hostname or IP for the boot server as reachable by all machines that will use it.
2 : For PXE to be functional, the 'next_server' field in /etc/cobbler/settings must be set to something other than 127.0.0.1, and should match the IP of the boot server on the PXE network.
3 : SELinux is enabled. Please review the following wiki page for details on en suring cobbler works correctly in your SELinux environment:
4 : change 'disable' to 'no' in /etc/xinetd.d/tftp
5 : Some network boot-loaders are missing from /var/lib/cobbler/loaders. If you only want to handle x86/x86_64 netbooting, you may ensure that you have insta lled a *recent* version of the syslinux package installed and can ignore this message entirely. Files this directory, should you want to support all archi tectures, should include pxelinux.0, menu.c32, elilo.efi, and yaboot.
6 : enable and start rsyncd.service with systemctl
7 : debmirror package is not installed, it will be required to manage debian de ployments and repositories
8 : ksvalidator was not found, install pykickstart
9 : The default password used by the sample templates for newly installed machi nes (default_password_crypted in /etc/cobbler/settings) is still set to 'cobbler' and should be changed, try: "openssl passwd -1 -salt 'random-phrase-here' 'your-password-here'" to generate new one
10 : fencing tools were not found, and are required to use the (optional) power management features. install cman or fence-agents to use them
Restart cobblerd and then run 'cobbler sync' to apply changes.
问题1:
server选项设置将用于Cobbler服务器地址的IP。这应该设置为您希望正在构建的主机与Cobbler服务器联系以获取HTTP和TFTP等协议的IP。
#修改后面server的ip地址为本机ip(仅主机通信使用网卡的ip)
sed -i 's/^server: 127.0.0.1/server: 192.168.56.103/' /etc/cobbler/settings
问题2:
next_server选项用于DHCP/PXE,作为下载网络引导文件的TFTP服务器的IP。通常,这将是与server设置相同的IP。
#修改next_erver为本机的IP(仅主机通信使用网卡的ip)
sed -i 's/^next_server: 127.0.0.1/next_server: 192.168.56.103/' /etc/cobbler/settings
问题3:
SELinux处于开启状态,前面已经临时关闭selinux并修改了selinux配置文件,只是没有重启,要消除这个提示重启下服务器即可,也可以直接忽略。
问题4:
#修改/etc/xinetd.d/tftp,把disable修改为no
sed -i 's#yes#no#g' /etc/xinetd.d/tftp
问题5:
安装的cobbler版本中,不支持使用该命令下载引导启动文件
问题6:
#添加rsync到自启动并启动rsync
systemctl enable rsyncd
systemctl start rsyncd
问题7:
#与debain相关,如果不使用cobbler推送debain系统可以忽略不记
yum -y install debmirror
sed -i 's|@dists=.*|#@dists=|' /etc/debmirror.conf
sed -i 's|@arches=.*|#@arches=|' /etc/debmirror.conf
问题8:
#ksvalidator未找到,安装pykickstart软件包。
yum install pykickstart -y
问题9:
# 设置默认root密码(客户端安装之后,系统的root密码)。
首先,生成你想要的密码的加密字符串,然后复制运行命令之后的加密代码:
#执行
openssl passwd -1 -salt 'abc' '123456'
#得到新密码
$1$abc$mJPQCTATLDV5aNzcHMYLr/
#再执行
vim /etc/cobbler/settings
#修改settings配置文件中下面位置,将双引号中的旧密码替换成新密码
default_password_crypted: "$1$123456$wOSEtcyiP2N/IfIl15W6Z0"
问题10:
#未找到防护工具,并且必须使用防护工具才能使用(可选)电源管理功能。 安装cman或fence-agents以使用它们。
yum -y install fence-agents
接着重启Cobbler服务
service cobblerd restart
最后再次执行cobbler check
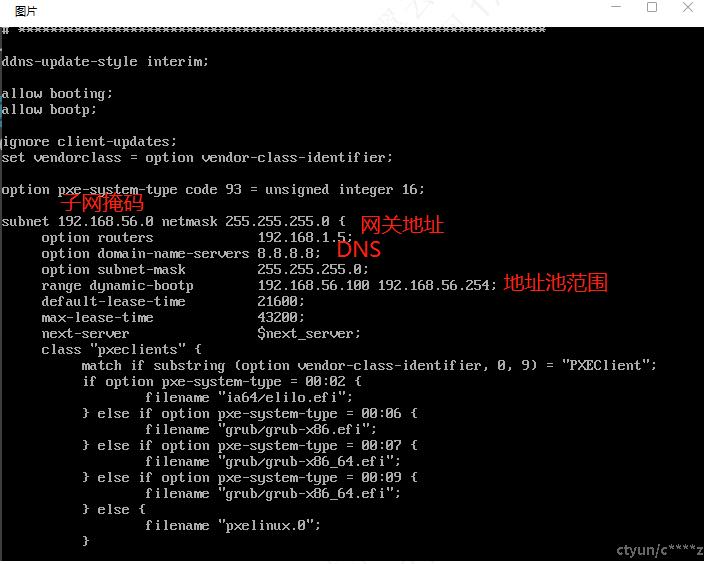
2.2.4 配置cobbler-dhcp
为了PXE引导,您需要一个DHCP服务器来分发地址,并将引导系统引导到TFTP服务器,在那里它可以下载网络引导文件。
vim /etc/cobbler/dhcp.template
2.2.5 重启并同步DHCP相关配置
systemctl restart cobblerd
cobbler sync
2.2.6 重启所有服务
systemctl restart httpd rsyncd dhcpd xinetd cobblerd
systemctl enable httpd rsyncd dhcpd xinetd cobblerd
2.3 在cobbler服务器中导入镜像
2.3.1 将镜像文件挂载到服务器上
方法1:直接将镜像文件拷贝至root目录下
mkdir /mnt/CentOS7.1
mount /home/iso/CentOS-7-x86_64-DVD-2009.iso /mnt/CentOS7.1
方法2:将光驱中的内容进行挂载
1)设置CD/DVD设备状态勾选已连接
2)使用df -h命令查看光盘是否挂载,即是否有/dev/sr*的盘符
1 umount /dev/sr1 #先卸载
2 mkdir /mnt/CentOS7.1 #创建cdrom挂载点
3 mount /dev/sr1 /mnt/CentOS7.1 #将光盘挂载到刚才创建的cdrom
4 df-h #查看当前挂载
2.3.2 将镜像文件导入到cobbler服务器上
使用命令cobbler import导入镜像
cobbler import --path=/mnt/CentOS7.1 --name=Centos-7.1 --arch=x86_64
#命令格式说明:
--path:镜像路径;
--name:安装引导名,自定义一个名字;
--arch:32位或64位。目前支持的选项有:x86| x86_64|ia64
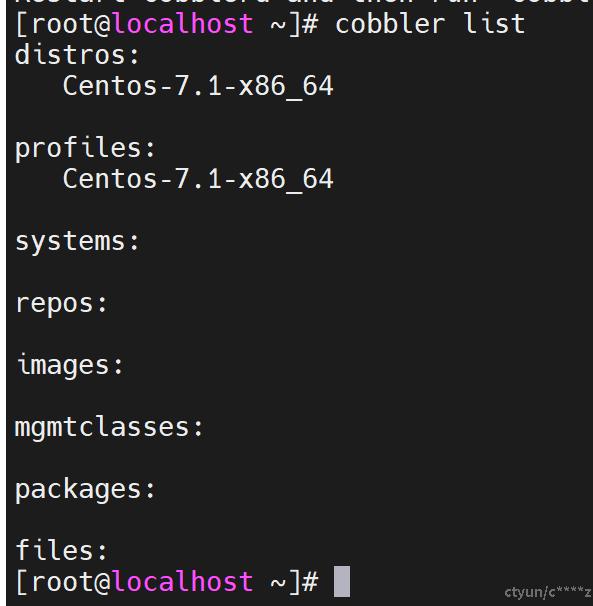
2.3.3 导入成功后,查看镜像列表
使用命令cobbler list查看镜像列表
2.4 在cobbler服务器中导入镜像
2.4.1 KS文件获取方式
(1)方法1
每安装好一台Centos机器,Centos安装程序都会创建一个kickstart配置文件,记录你的真实安装配置。如果你希望实现和某系统类似的安装,
可以基于该系统的kickstart配置文件来生成你自己的kickstart配置文件。(生成的文件名字叫anaconda-ks.cfg位于/root/anaconda-ks.cfg)
(2)方法2
Centos提供了一个图形化的kickstart配置工具。在任何一个安装好的Linux系统上运行该工具,就可以很容易地创建你自己的kickstart配置文件。
kickstart配置工具命令为redhat-config-kickstart(RHEL3)或system-config-kickstart(RHEL4,RHEL5)
(3)方法3
阅读kickstart配置文件的手册。用任何一个文本编辑器都可以创建你自己的kickstart配置文件。
2.4.2 自定义KS文件
进入kickstarts目录
cd /var/lib/cobbler/kickstarts
自定义KS文件
执行vim CentOS-7.1-x86_64.ks进行编辑,内容如下:
# kickstart template for Fedora 8 and later.
# (includes %end blocks)
# do not use with earlier distros
# Fedora 8及以后版本的Kickstart模板。
# (包括%end块)
# 不适用于早期的发行版
# System authorization information
#auth --useshadow --enablemd5
authconfig --enableshadow --passalgo=sha512
# 设置系统授权信息
# authconfig命令启用影子口令并使用SHA-512算法
# System bootloader configuration
bootloader --location=mbr --driveorder=sda --append="nomodeset crashkernel=auto rhgb quiet"
# 设置系统引导加载器配置
# 在主引导记录(MBR)位置安装引导加载器,设置硬盘驱动顺序,指定内核启动参数
# Partition clearing information
clearpart --all --initlabel
# 清空所有分区信息
# Use text mode install
text
# 使用文本模式进行安装
# Firewall configuration
firewall --disabled
# 防火墙配置为禁用
# Run the Setup Agent on first boot
firstboot --disable
# 在第一次引导时禁用系统设置代理
# System keyboard
keyboard us
# 设置系统键盘为美式英语
# System language
lang en_US
# 设置系统语言为美式英语
# Use network installation
url --url=$tree
# 使用网络安装,指定安装介质的URL
# If any cobbler repo definitions were referenced in the kickstart profile, include them here.
$yum_repo_stanza
# 如果Kickstart配置中引用了任何Cobbler软件仓库定义,将其包含在这里
# Network information
$SNIPPET('network_config')
# 网络配置信息
# Reboot after installation
reboot
# 安装完成后重新启动
logging --level=info
# 设置安装日志级别为info
# Root password
rootpw --iscrypted $default_password_crypted
# 设置Root用户密码,使用已加密的密码
# SELinux configuration
selinux --disabled
# 禁用SELinux
# Do not configure the X Window System
skipx
# 不配置X Window系统
# System timezone
timezone Asia/Shanghai
# 设置系统时区为亚洲/上海
# Install OS instead of upgrade
install
# 执行全新安装而不是升级
# Clear the Master Boot Record
zerombr
# 清空主引导记录
# Allow anaconda to partition the system as needed
#autopart
part /boot --fstype=ext4 --asprimary --size=200
part swap --asprimary --size=1024
part / --fstype=ext4 --grow --asprimary --size=200
# 允许Anaconda按需对系统进行分区
# 设置/boot、swap和/分区的信息
%pre
$SNIPPET('log_ks_pre')
$SNIPPET('kickstart_start')
$SNIPPET('pre_install_network_config')
# Enable installation monitoring
$SNIPPET('pre_anamon')
%end
# 在安装之前执行的脚本部分
# log_ks_pre、kickstart_start、pre_install_network_config、pre_anamon等预安装脚本
%packages
@base
@compat-libraries
@core
@debugging
@development
@dial-up
@hardware-monitoring
@performance
sgpio
device-mapper-persistent-data
systemtap-client
tree
lrzsz
telnet
nmap
dos2unix
%end
# 安装的软件包列表,包括基本系统、调试工具、开发工具、硬件监控等
%post --nochroot
$SNIPPET('log_ks_post_nochroot')
%end
# 在chroot环境之外执行的安装后脚本
%post
$SNIPPET('log_ks_post')
# Start yum configuration
$yum_config_stanza
# End yum configuration
$SNIPPET('post_install_kernel_options')
$SNIPPET('post_install_network_config')
$SNIPPET('func_register_if_enabled')
$SNIPPET('download_config_files')
$SNIPPET('koan_environment')
$SNIPPET('redhat_register')
$SNIPPET('cobbler_register')
# Enable post-install boot notification
$SNIPPET('post_anamon')
# Start final steps
$SNIPPET('kickstart_done')
# End final steps
%end
# 在chroot环境内执行的安装后脚本
# log_ks_post、post_install_kernel_options、post_install_network_config等脚本
# 配置yum、注册系统、启用后安装引导通知、最后的步骤
%post
systemctl disable postfix.service
# 禁用Postfix服务
$yum_config_stanza
%end
# 在chroot环境内执行的安装后脚本,禁用Postfix服务并进行yum配置
2.4.3 其它常用命令
(1)获取名为 "Centos-7.1-x86_64" 的 Cobbler 配置文件的 Kickstart 内容
cobbler profile report --name=Centos-7.1-x86_64
(2)编辑名为 "Centos-7.1-x86_64" 的 Cobbler 配置文件,将其关联的 Kickstart 文件路径设置为 /var/lib/cobbler/kickstarts/CentOS-7.1-x86_64.ks。
cobbler profile edit --name=Centos-7.1-x86_64 --kickstart=/var/lib/cobbler/kickstarts/CentOS-7.1-x86_64.ks
2.4.4 同步cobbler并重启所有服务
cobbler sync
systemctl restart xinetd.service
systemctl restart cobblerd.service
systemctl restart httpd.service
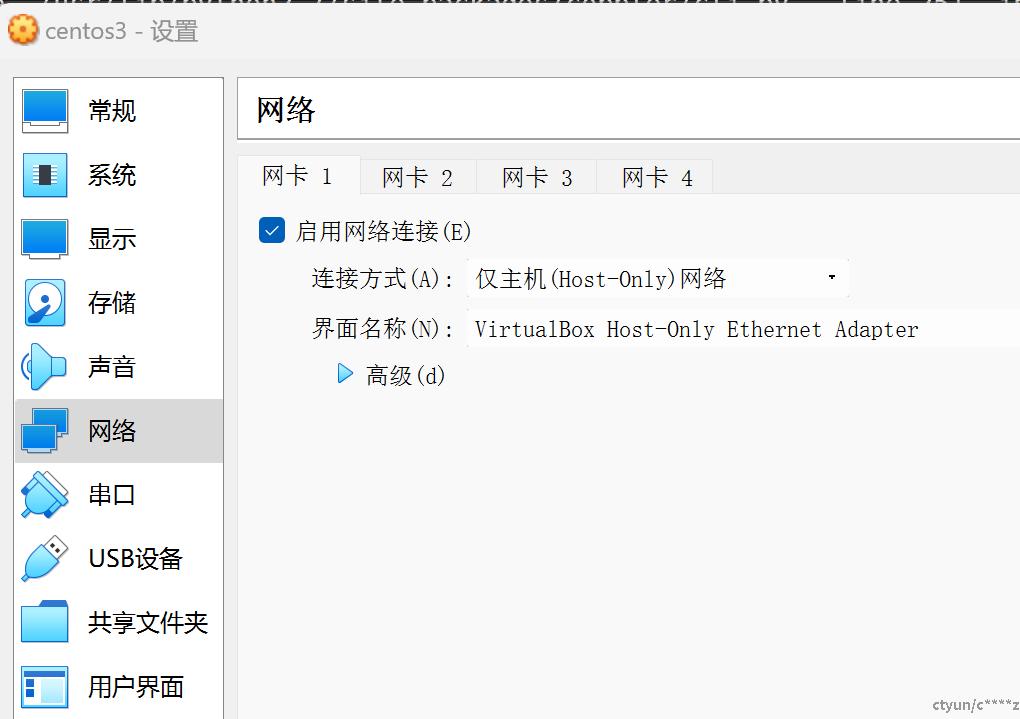
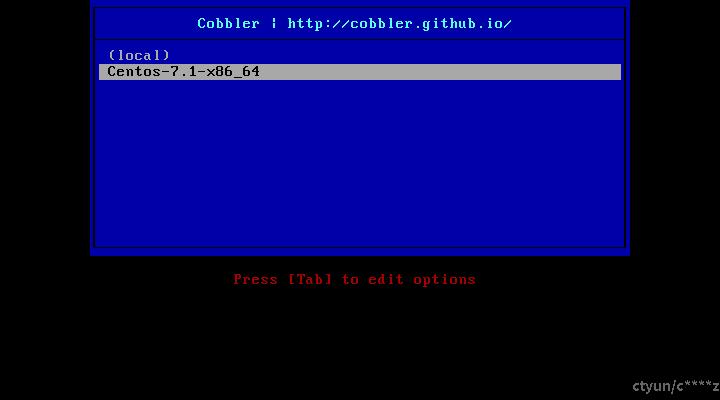
2.4.5 cobbler装机
在virtual box中新建一台虚拟机不装机,其中网卡配置为1块,为仅主机通信(用于服务端与客户端通信)
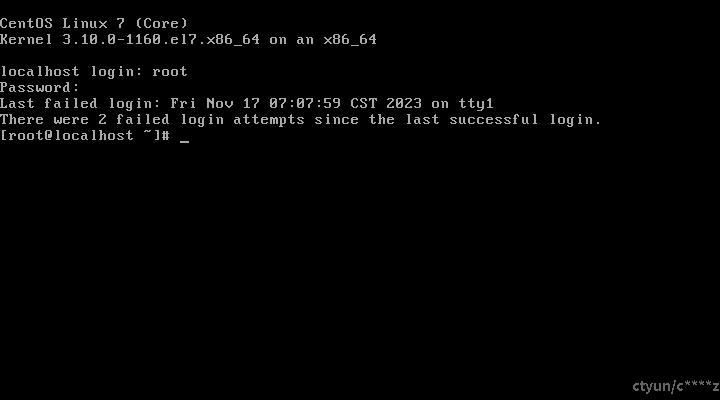
点击启动后进行选择,即可装机
登陆账号密码即为前面所设置的