本文将介绍Grafana如何配置发送告警的邮箱,同时给出发送告警邮件的示例。

将警告的信息以邮件的形式发送到指定邮箱之前,需要先配置grafana的发送邮箱,即默认用哪个邮箱发送警告邮件。
1、修改配置
修改grafana的配置文件,默认在/etc/grafana/grafana.ini。
执行sudo vi grafana.ini编辑文件,原始邮件配置为:
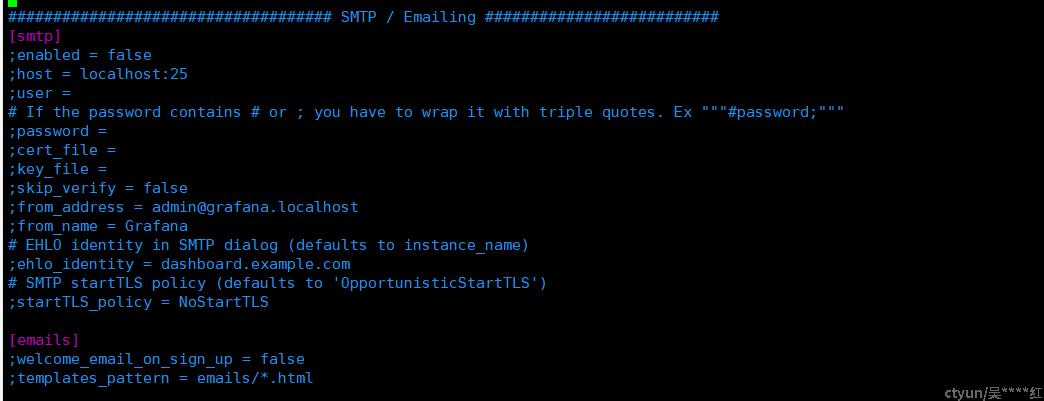
#################################### SMTP / Emailing ##########################
[smtp]
enabled = true
host = smtp.qq.com:465
user = xxx@qq.com
# If the password contains # or ; you have to wrap it with triple quotes. Ex """#password;"""
password = xx
;cert_file =
;key_file =
;skip_verify = false
from_address = xxx@qq.com
from_name = Grafana
# EHLO identity in SMTP dialog (defaults to instance_name)
;ehlo_identity = dashboard.example.com
# SMTP startTLS policy (defaults to 'OpportunisticStartTLS')
;startTLS_policy = NoStartTLS

[emails]
welcome_email_on_sign_up = true
;templates_pattern = emails/*.html-
-
user与from_address都配置为发送邮箱即可。
-
password为邮箱授权码。\textcolor{red}{【特别声明】:}此处为邮箱授权码而不是邮箱密码,下面会说明配置为邮箱密码出现的问题。
-
sudo service grafana-server restart3、测试邮件发送
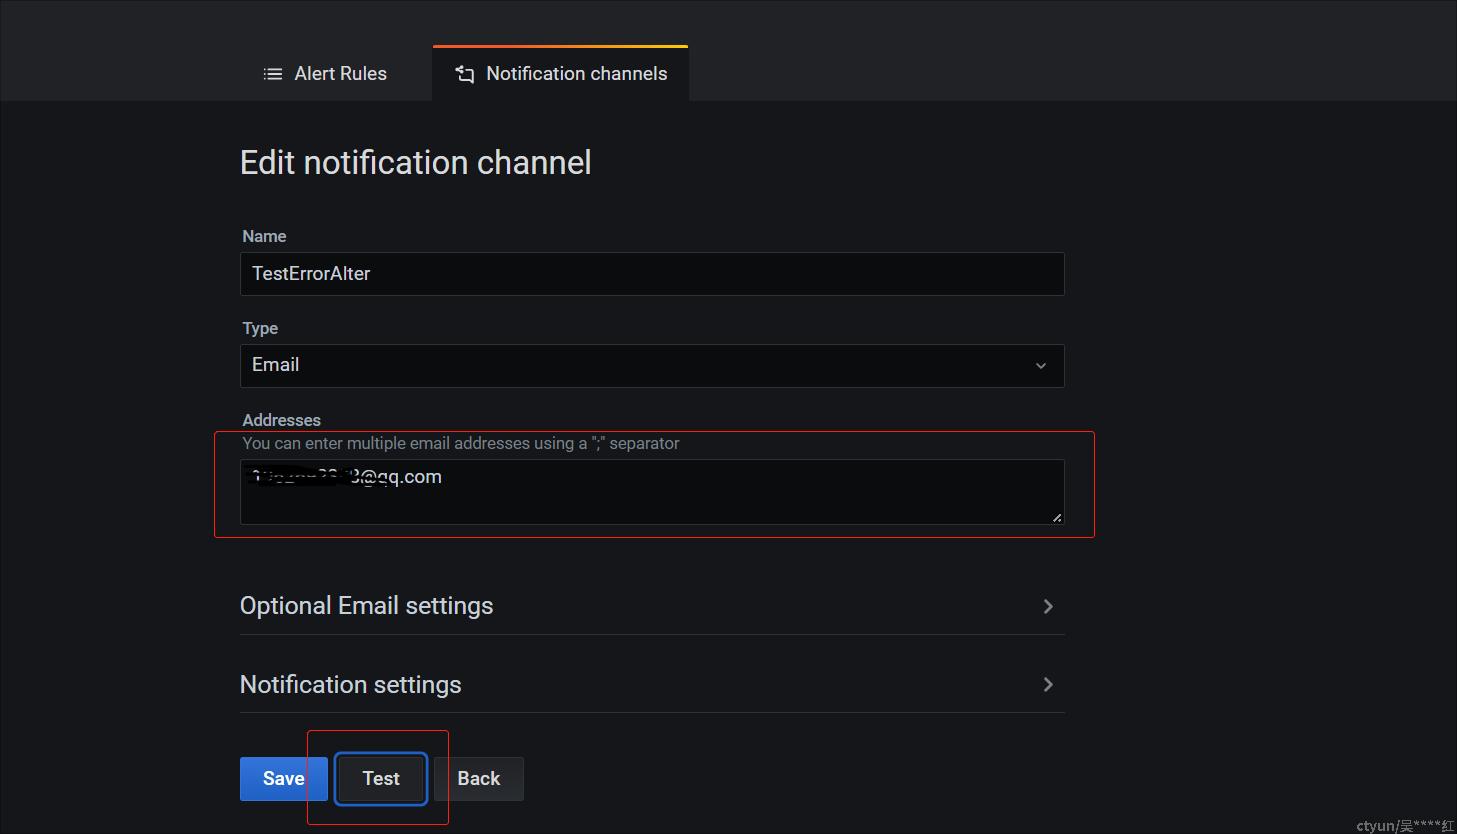
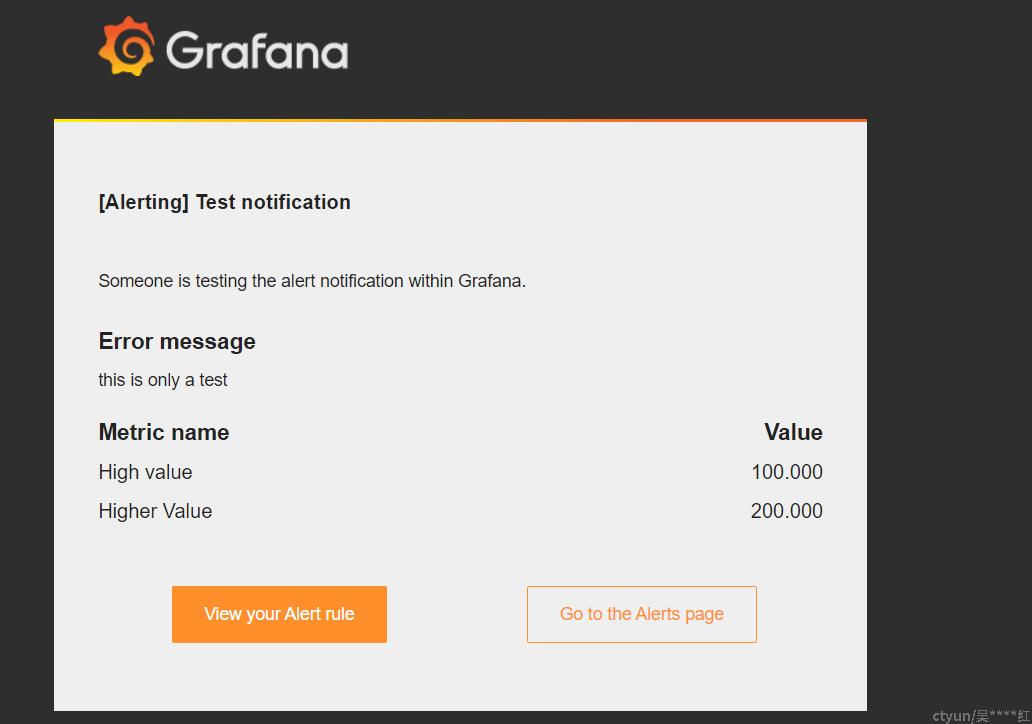
配置发送邮箱,然后点击TEST,去qq邮箱中查看,可以看到发送的邮件: