1. 安装支持spdk的fio版
# git clone https://github.com/axboe/fio
# cd fio && git checkout fio-3.3
# make
# make install
2. spdk安装步骤
2.1 按照官方文档操作
https://spdk.io/doc/getting_started.html
Getting the Source Code
#git clone https://github.com/spdk/spdk
#cd spdk
#git submodule update --init
Installing Prerequisites
Thescripts/pkgdep.shscript will automatically install the bare minimum dependencies required to build SPDK. Use--helpto see
information on installing dependencies for optional components.
#sudo scripts/pkgdep.sh
Option –all will install all dependencies needed by SPDK features.
#sudo scripts/pkgdep.sh --all
Building
Linux:
#./configure
#make
FreeBSD: Note: Make sure you have the matching kernel source in /usr/src/
#./configure
#gmake
There are a number of options available for the configure script, which can be viewed by running
#./configure --help
Note that not all features are enabled by default. For example, RDMA support (and hence NVMe over Fabrics) is not enabled by
default. You can enable it by doing the following:
#./configure --with-rdma
#make
Running the Unit Tests
It's always a good idea to confirm your build worked by running the unit tests.
#./test/unit/unittest.sh
You will see several error messages when running the unit tests, but they are part of the test suite. The final message at the end of
the script indicates success or failure.
2.2 手动安装
# git clone https://github.com/spdk/spdk --从github下载spdk, 开始安装spdk
1) # cd spdk
2)# git submodule update --init
3)# ./configure--with-fio=/path/to/fio/repo <other configuration options>
(例如:./configure --with-fio=/usr/src/fio)
4)# yum install meson gcc-c++ uuid uuid-devel libuuid libuuid-devel openssl-devel ncurses-devel CUnit-devel re2c python-pyelftools.
noarch -y
5)手动安装ninja --ninja是比make还快的小型构建系统
git clone git://github.com/ninja-build/ninja.git
# ./configure.py --bootstrap
# cp ninja /usr/bin
# pip3 install pyelftools
6) # make
如果make继续报错,每次都重新执行./configure,然后再make看看哪里出错
3. 配置hugepages
1)默认hugepage比较小,不足以给用户空间模式下nvme ssd使用
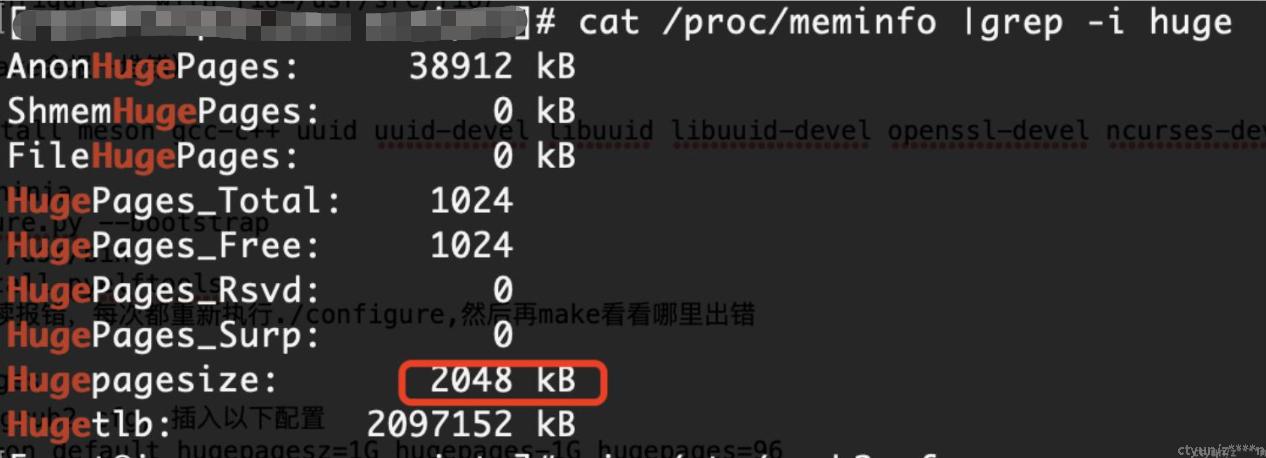
2)通过修改/etc/grub2.cfg, 插入以下配置
intel_iommu=on default_hugepagesz=1G hugepages-1G hugepages=96, 重启服务器后生效,修改后如下:
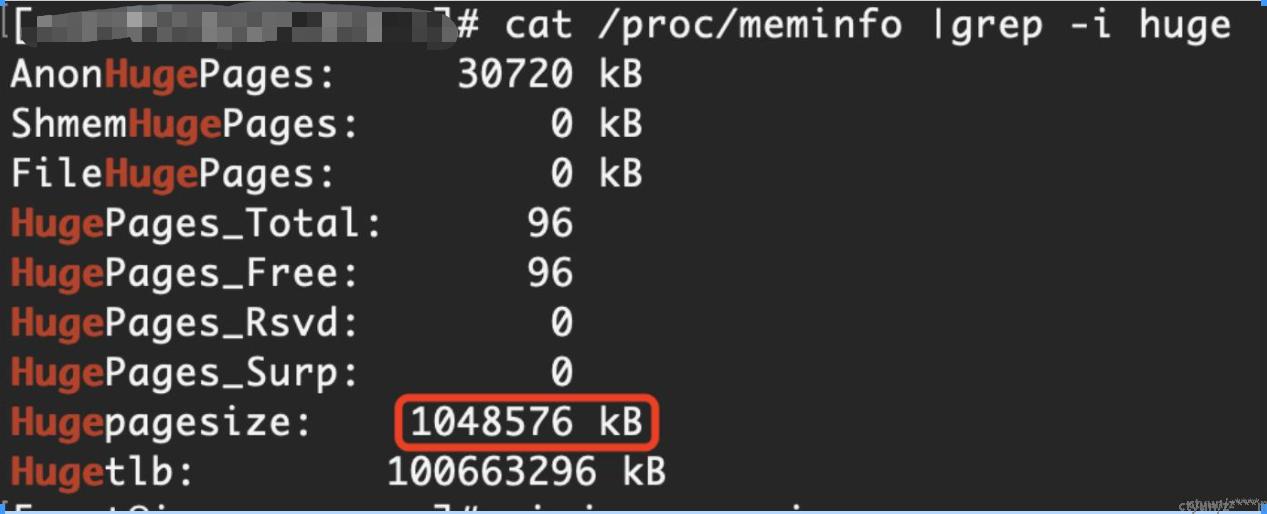
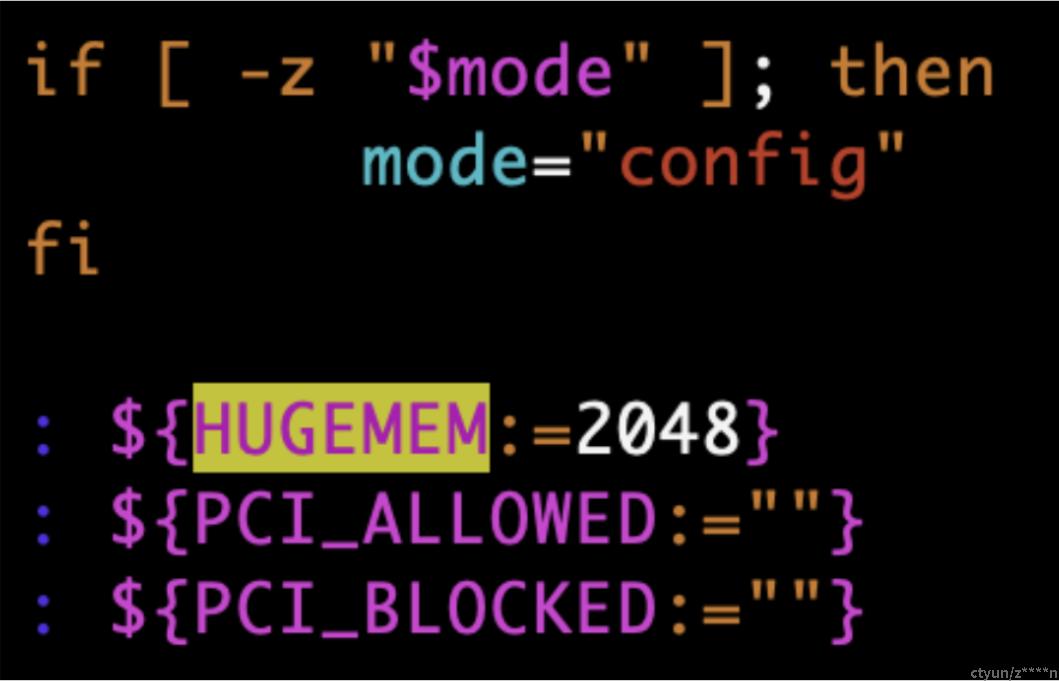
4. 内核态切换到User Space(用户空间)模式下
1) 切换到SPDK目录所在路径,将NVME设备从kernel space切换为user space
user space切回kernel space的方法:./setup.sh reset
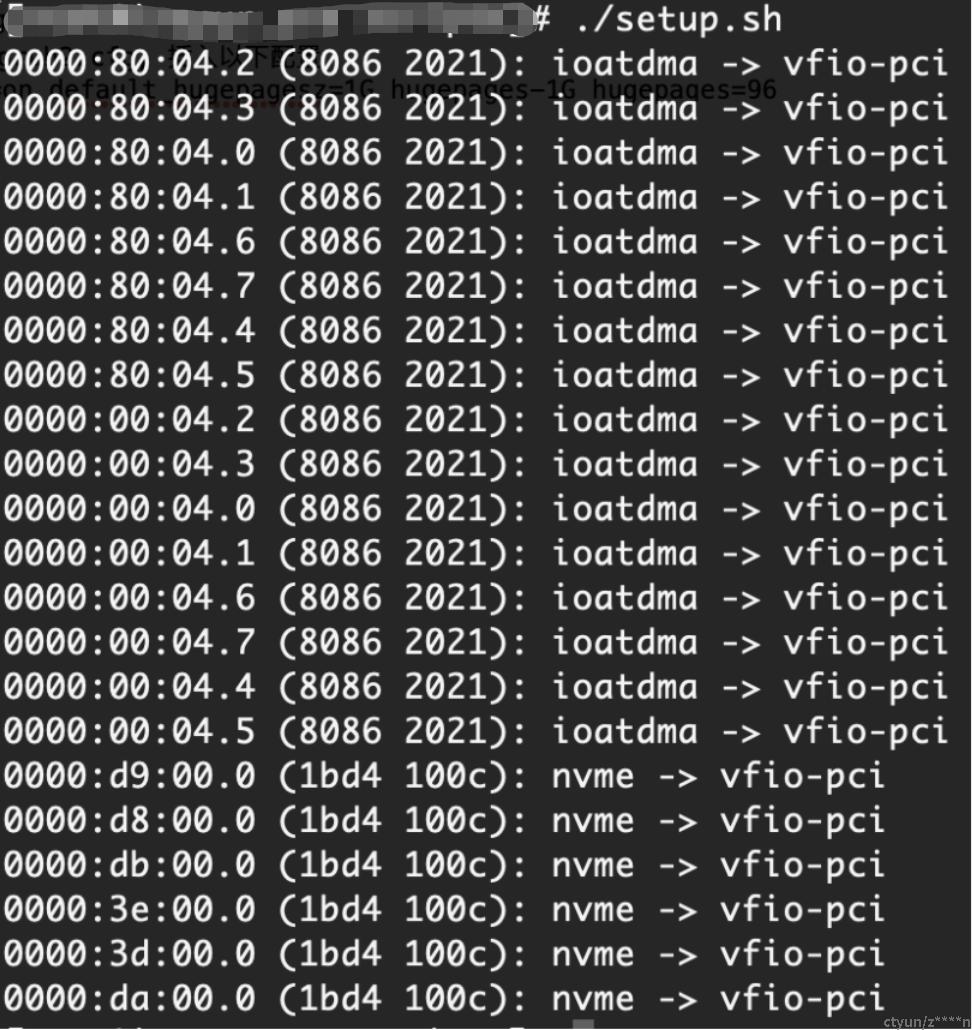
也可以选择性切换哪些NVME SSD,需要在setup.sh里添加黑名单,
修改${PCI_BLOCKED:=""}这一行, ${PCI_BLOCKED:="0000:[NVME_BDF_ADDRESS"}-多个设备中间加空格
5. 使用SPDK的perf或bdevpef工具测试NVME SSD性能
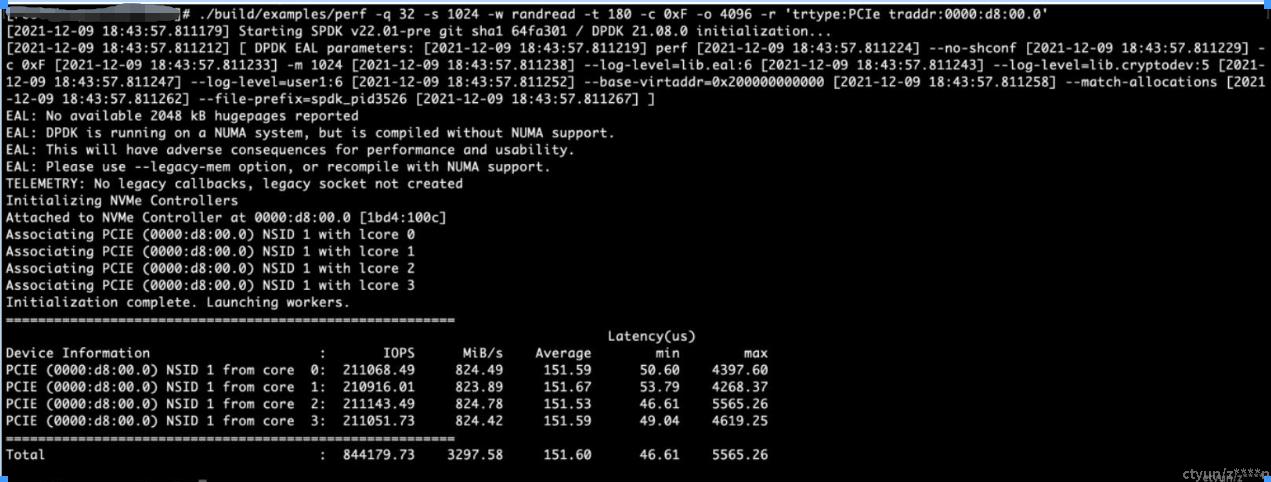
./build/examples/perf -q 32 -s 1024 -w randread -t 180 -c 0xF -o 4096 -r 'trtype:PCIe traddr:0000:d8:00.0'
详细参数请用./build/examples/perf -h查看,常用参数解析:
【-b, --allowed-pci-addr <addr> allowed local PCIe device address】
Example: -b 0000:d8:00.0 -b 0000:d9:00.0
【-q, --io-depth <val> io depth】
【-s, --hugemem-size <MB> DPDK huge memory size in MB.】
【-w, --io-pattern <pattern> io pattern type, must be one of(read, write, randread, randwrite, rw, randrw)】
【-t, --time <sec> time in seconds】
【-a, --warmup-time <sec> warmup time in seconds】
【-c, --core-mask <mask> core mask for I/O submission/completion.】 (default: 1)
【-o, --io-size <val> io size in bytes】
【-r, --transport <fmt> Transport ID for local PCIe NVMe or NVMeoF】
Format: 'key:value [key:value] ...'
Keys:
trtype Transport type (e.g. PCIe, RDMA)
adrfam Address family (e.g. IPv4, IPv6)
traddr Transport address (e.g. 0000:04:00.0 for PCIe or 192.168.100.8 for RDMA)
trsvcid Transport service identifier (e.g. 4420)
subnqn Subsystem NQN (default: nqn.2014-08.org.nvmexpress.discovery)
ns NVMe namespace ID (all active namespaces are used by default)
hostnqn Host NQN
Example: -r 'trtype:PCIe traddr:0000:04:00.0' for PCIe or
-r 'trtype:RDMA adrfam:IPv4 traddr:192.168.100.8 trsvcid:4420' for NVMeoF
Note: can be specified multiple times to test multiple disks/targets.
备注:Perf: -c 0xF(相当于fio中numjob=4), -q 128(相当于fio中iodepth=128)
perf多核测试示例,测试中:

perf多核测试示例,测试后:
perf单核绑核测试(绑定在coremask为0x100对应的逻辑核为8上),示例测试中:
4k随机读测试命令:./perf -b 0000:31:00.0 -q 512 -o 4096 -w randread -t 60 -c 0x100

测试后

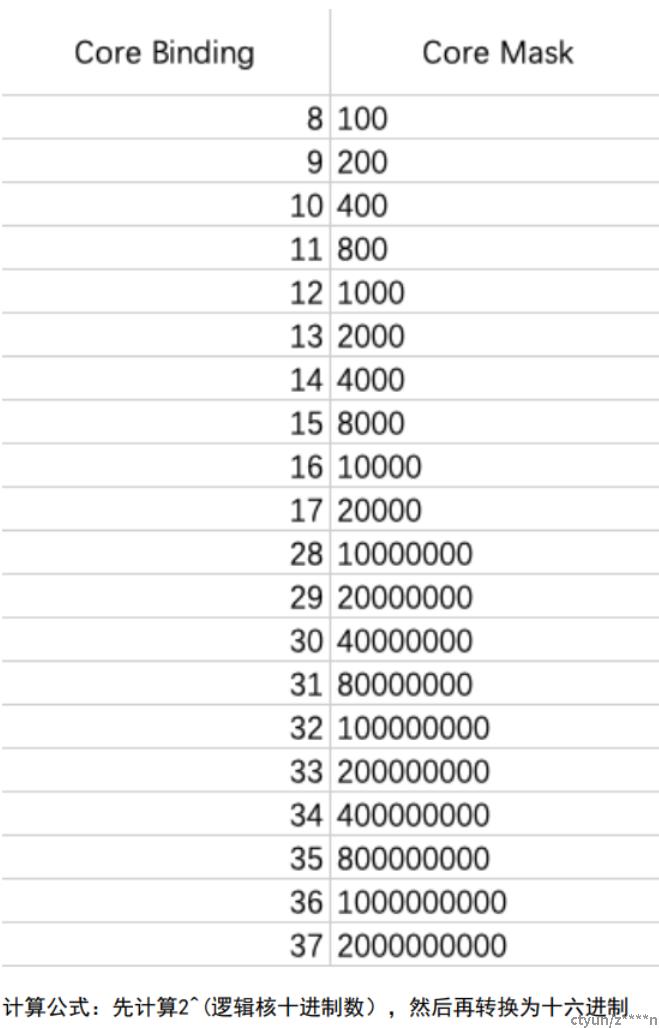
逻辑核和coremask的对应关系如下:
